Google ADs
Table of Contents
WooCommerce is a powerful eCommerce plugin for WordPress that allows you to create and manage an online store. Below are the step-by-step configuration instructions:
Step 1: Install WooCommerce Plugin
- Login to WordPress Admin Panel (yourdomain.com/wp-admin).
- Go to Plugins → Add New.
- In the search bar, type WooCommerce.
- Click Install Now, then Activate.

Step 2: WooCommerce Setup Wizard
After activation, WooCommerce launches a setup wizard. Follow these steps:
- Store Details
- Enter your store name, country, address, and currency.
- Click Continue.
- Industry & Product Type
- Choose the industry (e.g., fashion, electronics, digital downloads, etc.).
- Select the product type (physical, digital, subscriptions, etc.).
- Click Continue.
- Business Details
- Choose business size and additional recommended plugins (optional).
- Click Continue.
- Theme Selection
- Choose a theme (use the default theme or select a new one).
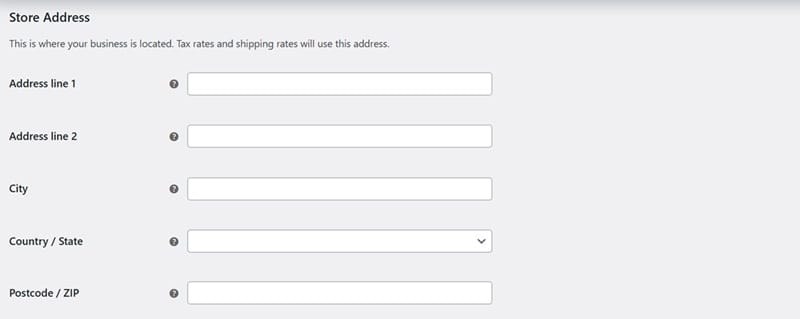
Step 3: Configure WooCommerce General Settings
- Go to WooCommerce → Settings.
- Under the General tab:
- Set Store Address.
- Select Selling Locations (worldwide or specific countries).
- Enable Taxes (if applicable).
- Set Currency Options.
Related: How to Improve Your ECommerce Website’s Network Security
Google ADs
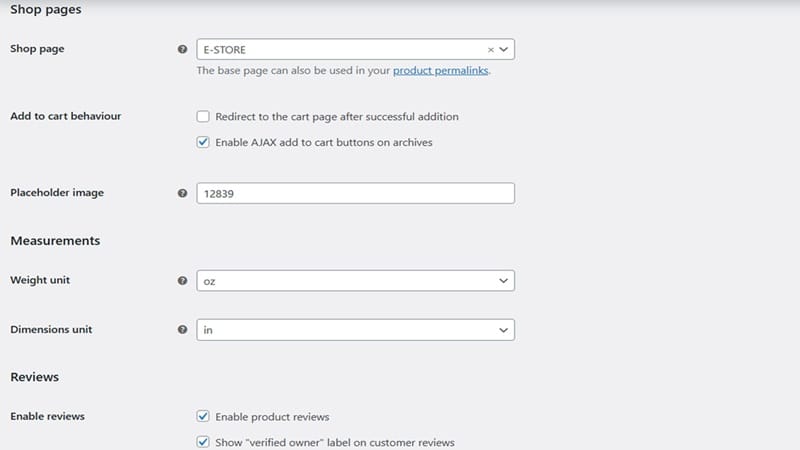
Step 4: Configure Products
- Go to WooCommerce → Settings → Products.
- Set up:
- Shop Page (default WooCommerce shop page).
- Measurement Units (for weight and dimensions).
- Enable/Disable Reviews.
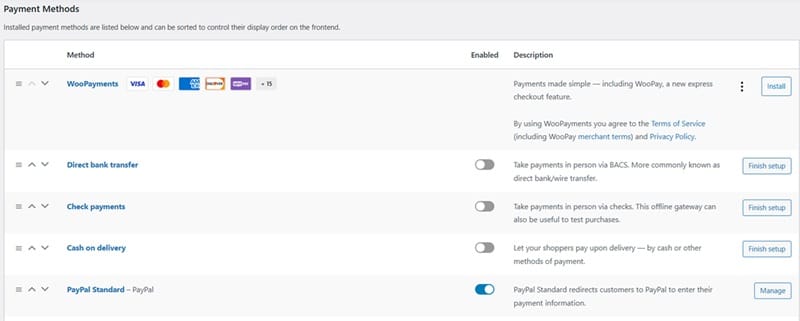
Step 5: Configure Payment Methods
- Go to WooCommerce → Settings → Payments.
- Enable and configure payment gateways like:
- PayPal (Enter API credentials).
- Stripe (For credit card payments).
- Cash on Delivery (For offline orders).
- Direct Bank Transfer.
- Save changes.
Step 6: Configure Shipping
- Go to WooCommerce → Settings → Shipping.
- Click Add Shipping Zone and define:
- Zone Name (e.g., USA, Europe).
- Shipping Methods (Flat Rate, Free Shipping, Local Pickup).
- Set Shipping Rates (if applicable).
- Save changes.
Step 7: Configure Taxes (Optional)
- Enable Taxes in WooCommerce → Settings → General.
- A Tax tab will appear:
- Define tax rates (Standard, Reduced, Zero).
- Enable/Disable tax display on cart & checkout.
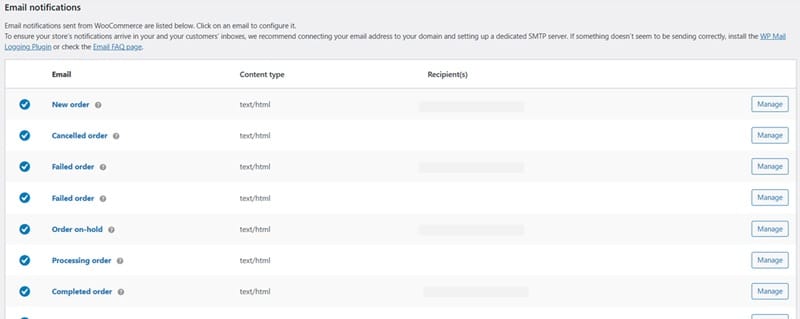
Step 8: Configure Emails
- Go to WooCommerce → Settings → Emails.
- Customize email templates for:
- New Orders, Cancellations, Customer Notifications.
- Set the From Name & Email Address.
- Save changes.
Step 9: Add Products
- Go to Products → Add New.
- Enter:
- Product Title & Description.
- Product Price.
- Product Image & Gallery.
- Inventory & Stock Status.
- Shipping Details.
- Click Publish.
Step 10: Test the Checkout Process
- Open your store URL.
- Add a product to the cart.
- Proceed to checkout and test payments.
- Confirm order details.
Final Step: Optimize & Launch
- Install SEO plugins (e.g., Rank Math, Yoast SEO).
- Set up Google Analytics & Facebook Pixel.
- Optimize for mobile devices.
- Perform a test order to ensure everything works.
ABOUT THE AUTHOR

Founder of AAR TECHNOSOLUTIONS, Rashmi is an evangelist for IT and technology. With more than 12 years in the IT ecosystem, she has been supporting multi domain functions across IT & consultancy services, in addition to Technical content making.
You can learn more about her on her linkedin profile – Rashmi Bhardwaj

