Table of Contents
Faster delivery of content to improve user experience and enhance productivity are key focuses of cloud providers. Majority of applications are hosted on the web /Internet. If all content is stored centrally at one place, then individual users will simply take a long time to access it.
However, content delivery networks facilitate quicker delivery of content over the web as they are a group of geographically distributed servers which speed up delivery of web content by making it move closure to users. Content delivery networks store cached content on edge servers in Point of Presence (POP) locations which are close to end users to reduce latency.
Today we look more in detail about Azure CDN (Content delivery network) services, its features and use cases, advantages and disadvantages and so on.
What is Azure CDN?
Azure Content Delivery Network (CDN) gives developers an enterprise solution to deliver high bandwidth content to users in a rapid manner and caches their content strategically at physical nodes placed across the geography.
Azure CDN can accelerate dynamic content, which is not possible to cache, and leverage various network optimizations using CDN POPs such as route optimization to bypass Border gateway Protocol (BGP).
Advantages
Benefits of Azure CDN are:
- Improved user experience and better performance is derived for end users especially when they are using applications which require multiple round trips for content loading
- Largely scalable to handle prompt high loads such as product launch / release event
- User request distribution and serving content directly from edge servers to manage less traffic to the origin server
How does Azure CDN work?
Let’s understand how CDN works with the below scenario. A user A requests a file (also known as asset) by using a URL with a special domain name such as <endpoint name>. This name could be an endpoint hostname or a custom domain. The DNS will route the request to the most performing POP location which is closed to the user geographically.
If no edge server in the POP has a file in their cache, the POP will request a file from the origin server. Origin server could be any public web server such as Azure Web app, Azure cloud service, Azure storage account and so on.
The origin server will return the file to edge server in POP.
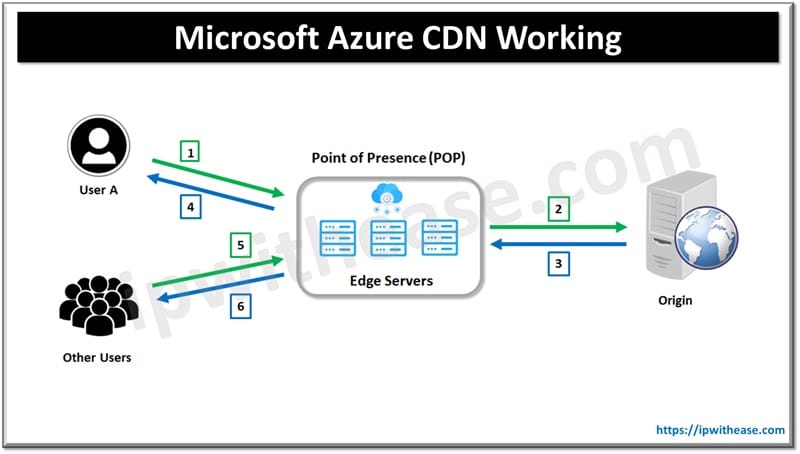
An edge server in POP will cache the file and send it to user A. File will remain in the cache of the edge server of POP until Time to Live (TTL) mentioned by its HTTP header expired. The default TTP is 7 days if not specified.
More users can request the same file using the same URL which User A used and will be directed to the same POP. If TTL of the file is not yet expired it would return the file to other users directly resulting in faster response.
Use of Azure CDN requires at least one Azure subscription. And you need to create one CDN profile, which is actually an endpoints collection of CDNs. Every CDN endpoint presents a specific configuration of behaviour of content delivery and its access. Multiple profiles can be used to organize CDN endpoints by internet domain, web application etc.
Limitations of Azure subscription w.r.t to CDN
- Number of CDN profiles that can be created (8 CDN profiles)
- Number of endpoints that can be created in a CDN profile (10 endpoints)
- Number of custom domains which can be mapped to endpoints (25 custom domains)
How to create an Azure CDN Profile and Endpoint?
Azure content delivery network (CDN) can be enabled by creating a new CDN profile.
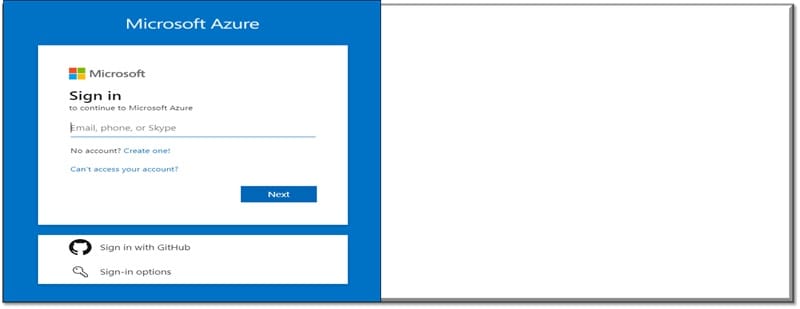
Sign in to Azure Portal
A CDN profile is a container for CDN endpoints and mentions a pricing tier
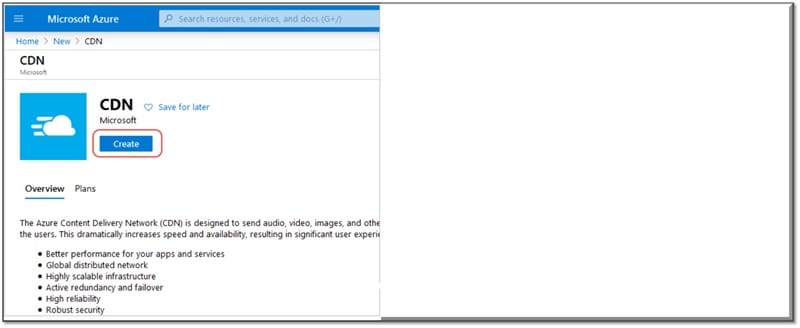
In Azure portal select create a resource (on upper left). The New pane will appear
Search for and Select CDN then choose Create
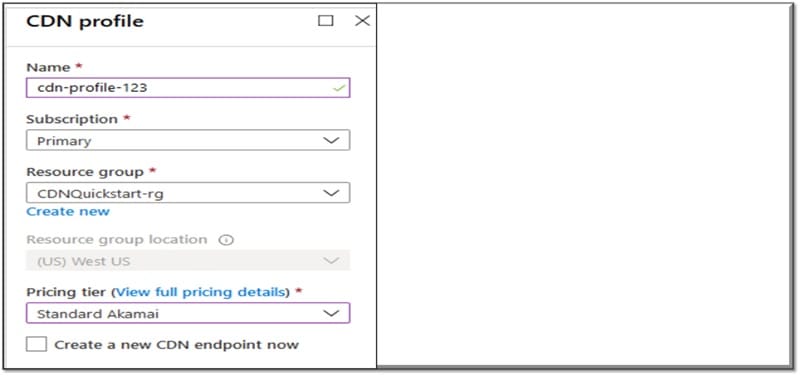
In CDN profile pane provide the following : Name, subscription, Resource group, resource group location, pricing tier then leave unselected <create a new CDN endpoint now>
Create a new CDN Endpoint
In Azure portal choose in your dashboard the CDN profile you created, on the CDN profile page select + endpoint
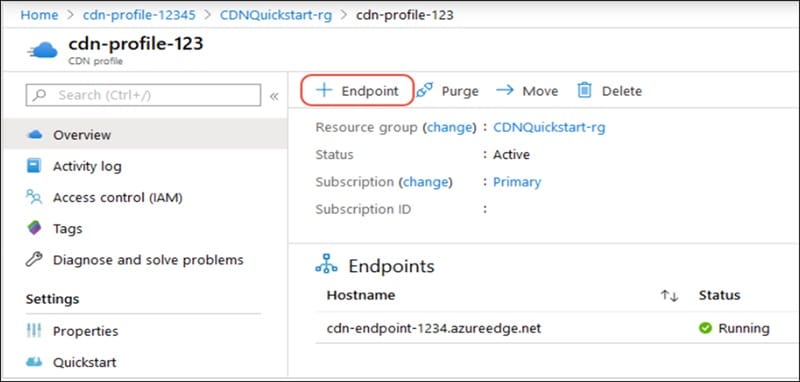
The Add Endpoint pane will appear, enter the following values : Name, origin type, origin hostname, Origin path (Leave blank), Origin host header (leave to default), Protocol(leave to default), Origin port (leave to default), optimized for (leave to default).
Select Add to create a new endpoint. Post creation, it will appear in the list of endpoints for the profile.
ABOUT THE AUTHOR

You can learn more about her on her linkedin profile – Rashmi Bhardwaj

