Table of Contents
In this post we are going to walk through the AWS RDS instance creation & various options available as we bring the instance up using the AWS Free Tier. For more information the RDS instance you may refer the <post>.
Step-by-Step Guide for AWS RDS Instance Creation
Step 1
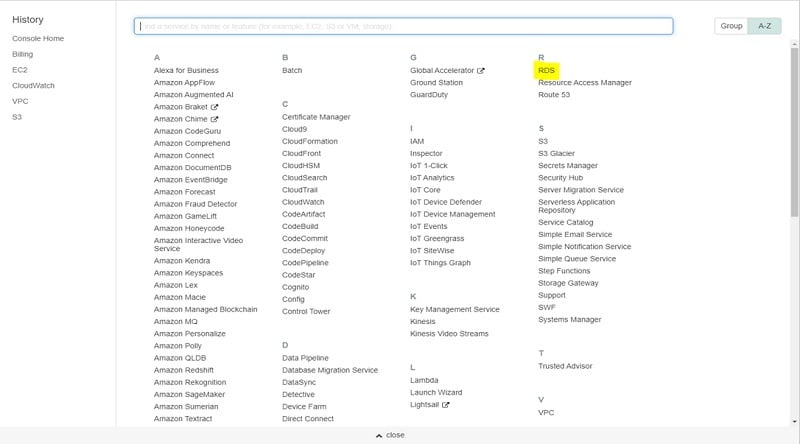
Login to your AWS Console, Browse to Services > RDS.
Step 2
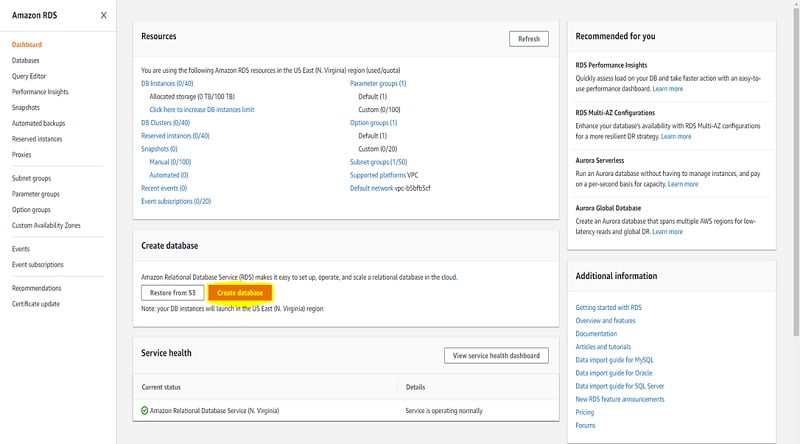
On next screen you get your RDS instance Dashboard with information i.e. DB instances running, Allocated Storage, DB Cluster, Snapshots etc. On this page you also get an option to “Create Database” Click on this as below:
Step 3
Once clicked on create database, next window opens up where you get to configure the various options for your RDS instance. First of all we select an engine option out of the available 6 options available on AWS as below:
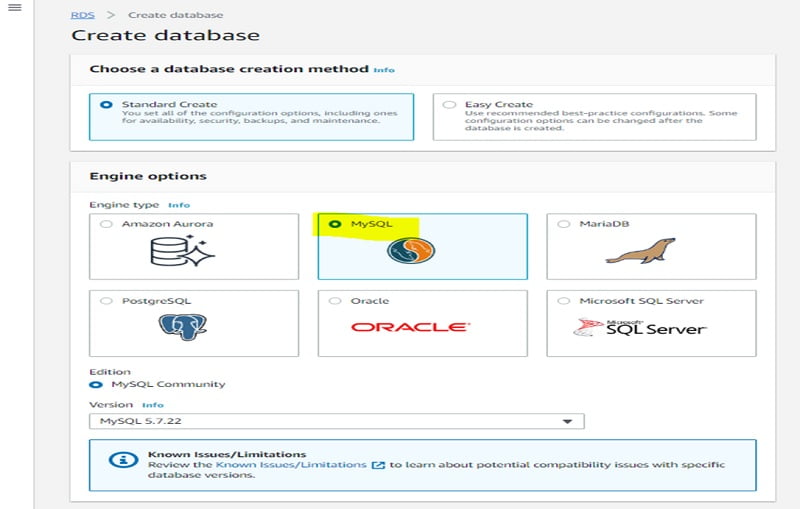
For this example we will use the MySQL engine option with Standard create.
Step 4
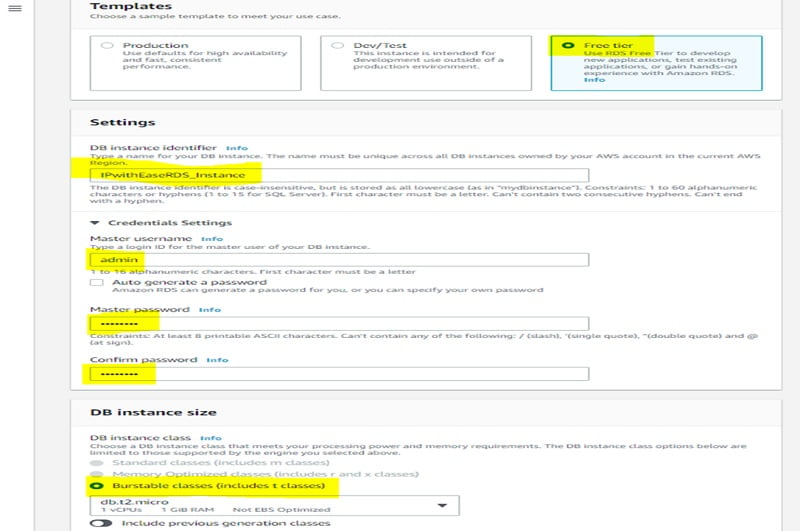
On the same screen if you browse down, you get to choose the Template based on your use case. We chose Free Tier here.
Next section lets you configure the settings for your DB instance i.e. your RDS instance name & Credentials for RDS instance.
Post that you get to select the DB Instance Size. We have the options greyed out here since we are working on Free Tier. In production deployments you might more options to configure your DB instance size.
Step 5
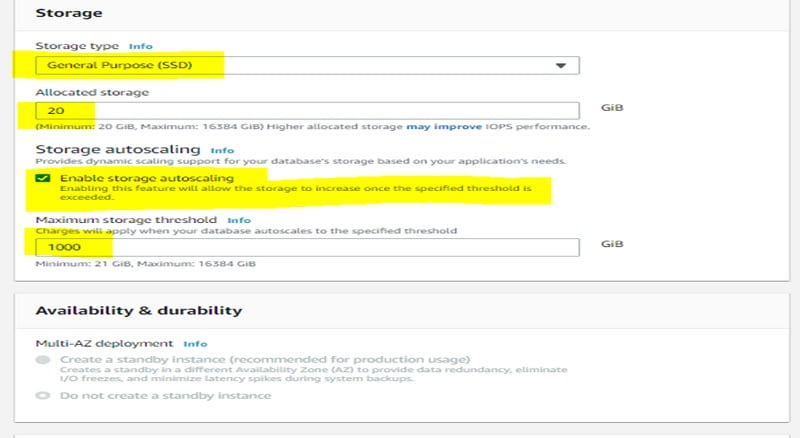
Scrolling further down, you get the options to configure the storage settings for your DB instance.
Next section provides an option to enable Multi-AZ on your DB instance. This option is greyed out on the free tier. Storage auto-scaling is enabled by default, which lets instance increase its size automatically if threshold configured is exceeded.
Step 6
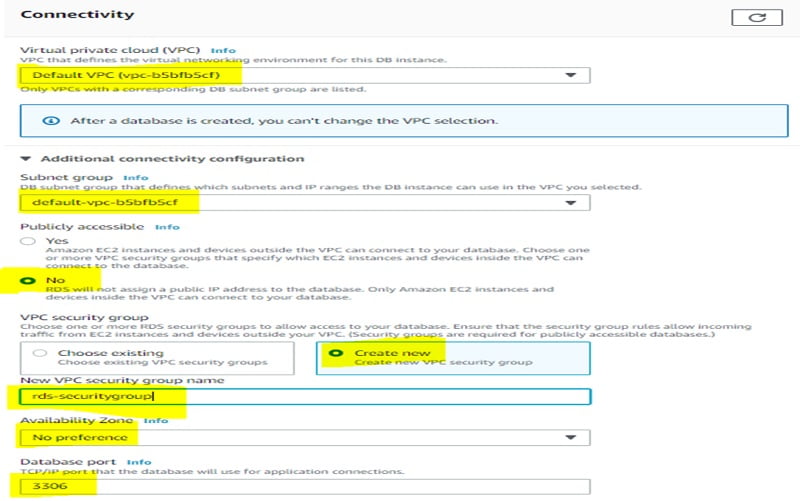
Further down on the next section, you get to configure the network settings for your DB instance. By default every DB instance goes to Default VPC. Some other settings include
Related – Default VPC vs Custom VPC in AWS
- Enabling Public Access to DB Instance
- Security Group assigned to this DB instance. We have made a new one, you could assign an existing one as well.
- Selection of AZ in which this DB instance will reside.
Port used for MySQL connections. This is default but you may change it as well.
Step 7
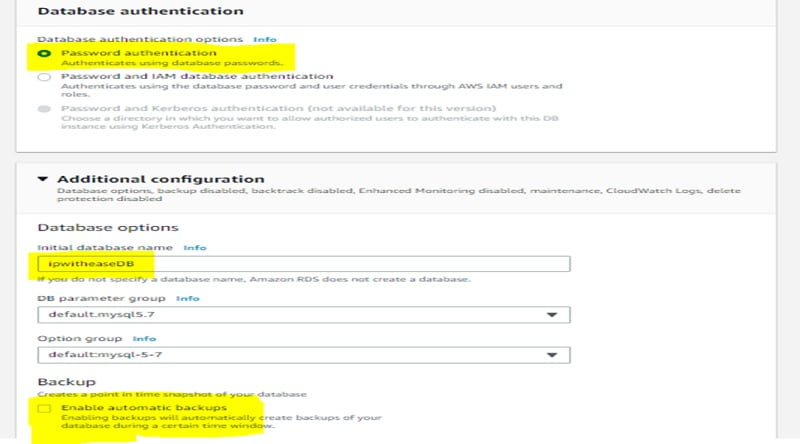
Next Section you will need to configure the authentication mechanism. We leave it to default password authentication.
Next you need to configure the mandatory DB name without which a DB instance isn’t created.
Next you get to choose the automatic backup settings. By default automatic backups are enabled but we will disable them.
Step 8
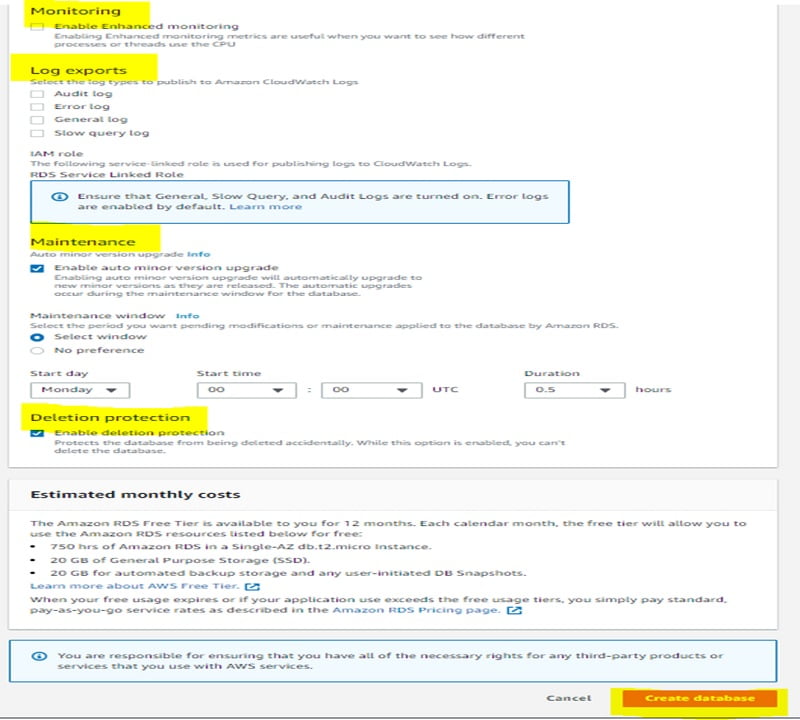
In this step you get to configure some miscellaneous options for monitoring, Logging, Maintenance Windows & Termination protection to prevent accidental deletion.
Once all the settings are done, click on create database at bottom.
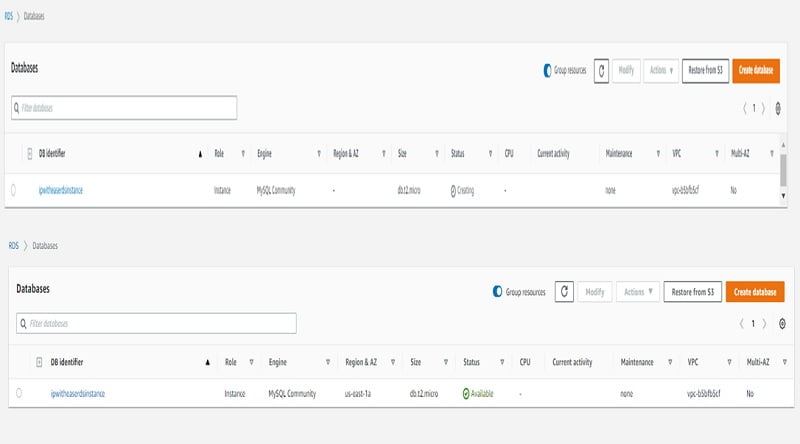
Database Instance may take around 10-15 minutes to come up. Once up it will show up as below.
ABOUT THE AUTHOR

I am here to share my knowledge and experience in the field of networking with the goal being – “The more you share, the more you learn.”
I am a biotechnologist by qualification and a Network Enthusiast by interest. I developed interest in networking being in the company of a passionate Network Professional, my husband.
I am a strong believer of the fact that “learning is a constant process of discovering yourself.”
– Rashmi Bhardwaj (Author/Editor)

