Google ADs
–
TO CREATE A SELF IP ADDRESS
- On the Main tab of the navigation pane, expand Network, and click Self IPs.This displays a list of existing self IP addresses.
- In the upper-right corner of the screen, click the Create button. Note: If the Create button is unavailable, you do not have permission to create a self IP address. You must have either the Administrator or Resource Administrator role assigned to your user account.
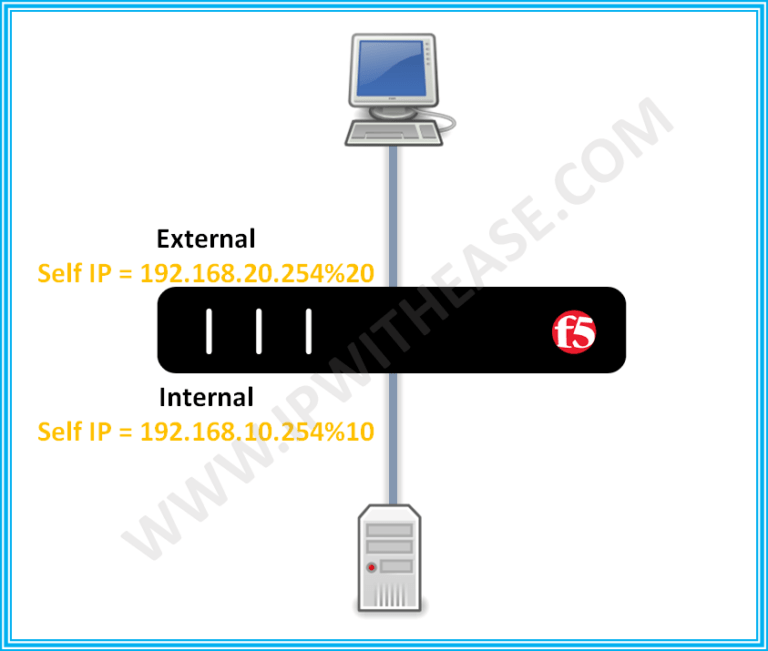
- For the Address setting: If you want the self IP address to pertain to a route domain other than the default route domain (0), append the route domain ID to the IP address, as in this example: 10.11.10.1%1. In this example, the %1 notation designates that the IP address 10.11.10.1 pertains to route domain 1. Note: For more information on route domains, see the TMOSTM Management Guide for BIG-IP Systems. If you want the self IP address to pertain to the default route domain (route domain 0), simply type an IP address. No route domain ID is required.
- In the Netmask box, type a netmask.
- For the VLAN setting, select the name of the VLAN to which you want to assign the self IP address.The default value is internal.
- For the Port Lockdown setting, select Allow Default, Allow All, Allow None, or Allow Custom.Selecting Allow Custom displays the Custom List setting. For more information on these setting values, see Specifying port lockdown.
- If you chose Allow Custom in step 7, click TCP, UDP, or Protocol.If you chose TCP or UDP, do one or both of the following: The value All or None appears in the TCP or UDP box. The port number appears in the TCP or UDP box.
- Click Port, type a port number, and then click Add.
- Click All or None and then click Add.
- If you chose Protocol, select a protocol name and click Add.
- If you want to configure the self IP address as a floating IP address, check the Floating IP box.
- To finish the configuration of this self IP address and create other self IP addresses, click Repeat and perform all previous steps until all self IP addresses have been created.
- Click Finished.
Related – F5 Interview Questions
MANAGING SELF IP ADDRESSES
Using the Configuration utility, you can view or change the properties of a self IP address, or delete a self IP address.
–
Google ADs
TO VIEW OR MODIFY THE SETTINGS OF A SELF IP ADDRESS
- On the Main tab of the navigation pane, expand Network, and click Self IPs. This displays a list of existing self IP addresses.
- In the IP Address column, click a self IP address. This displays the properties page for that self IP address.
- To change the setting values, modify the values and click Update. Note: You can modify any setting except IP Address. To modify the IP Address setting, you must delete the self IP address and create a new one. For more information, see To delete a self IP address, following, and To create a self IP address. This displays the list of existing self IP addresses.
TO DELETE A SELF IP ADDRESS
- On the Main tab of the navigation pane, expand Network, and click Self IPs.This displays a list of existing self IP addresses.
- In the IP address column, locate the self IP address you want to delete.
- Click the select box to the left of the IP address.
- Click Delete. A confirmation screen appears.
- Click Delete.
Reference –
ABOUT THE AUTHOR

Founder of AAR TECHNOSOLUTIONS, Rashmi is an evangelist for IT and technology. With more than 12 years in the IT ecosystem, she has been supporting multi domain functions across IT & consultancy services, in addition to Technical content making.
You can learn more about her on her linkedin profile – Rashmi Bhardwaj


