Table of Contents
Launching AWS EC2 Instance
As already discussed in the theory post , AWS EC2 Instance Pricing Model, AWS EC2 instance is simply a Virtual Machine running in the AWS cloud. In this post we will learn how to create EC2 instance using the AWS free tier.
Step 1
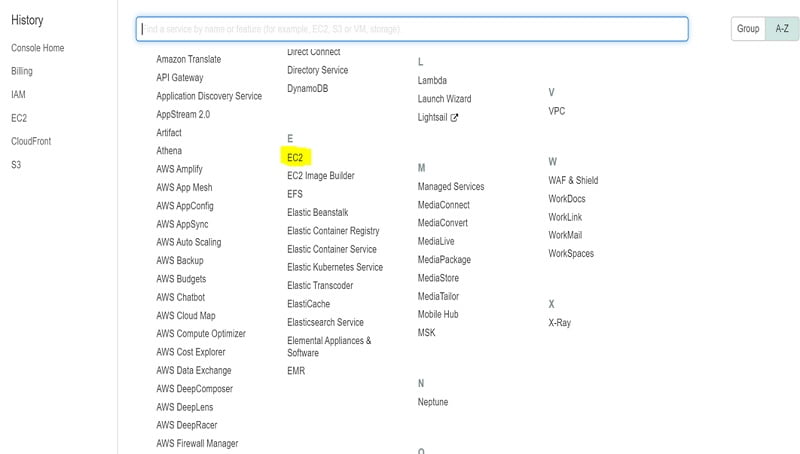
Login to your AWS Management Console & Click on the EC2 service.
Step 2
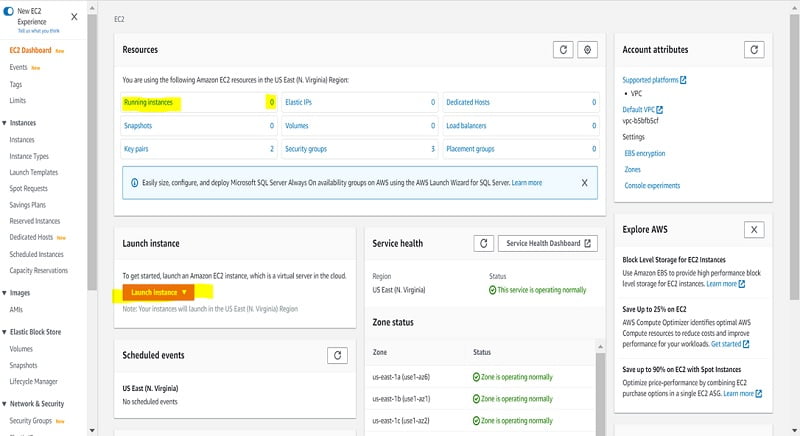
On the EC2 dashboard you will be able to how many EC2 instances are currently running, in our case its 0 since we don’t have currently any running instances. In order to begin and create one EC2 instance Click on the ‘Launch Instance’ Button.
Step 3
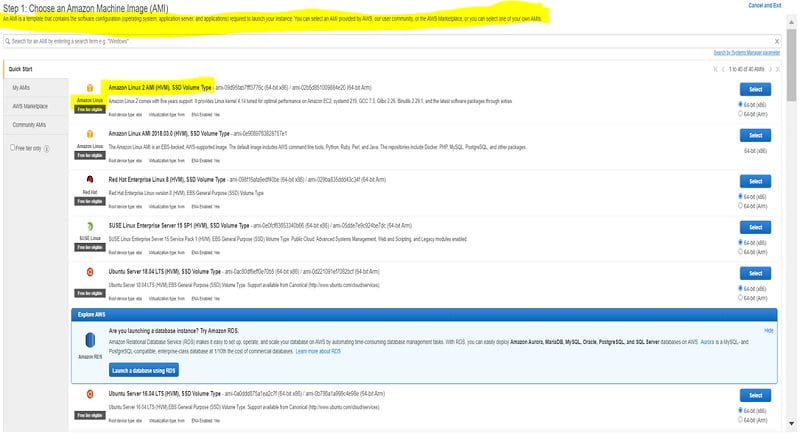
Once you Click Launch Instance, on the next window you will be asked to choose your AMI (Amazon Machine Image). AMI is just a template for the VM you are going to create which contains the Operating System, Application Servers and Applications required to bring up the Instance. You may choose from the variety of AMI’s available. In our example we choose free tier eligible Amazon Linux 2 AMI.
Step 4
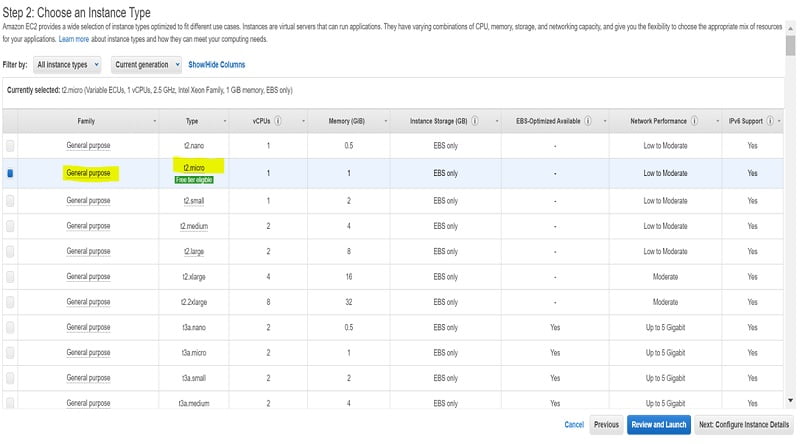
Once you select AMI, on next screen you will be asked to select the instance type. There are a whole lot of EC2 instance types available i.e. General purpose t2 micro, Compute optimized c5n.large etc. You may select it based on your use case, since we are using free tier we use t2 micro which is free tier eligible. Click on ‘Next Configure Instance Details’.
Step 5
On this screen you get a whole lot of options to configure your instance details. Click Add Storage.
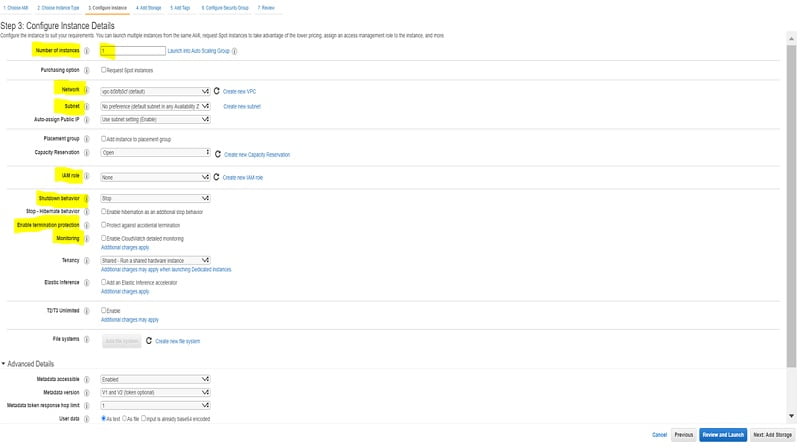
- Network – VPC in which this EC2 will be launched. Any new EC2 instance launched goes into default VPC.
- Subnet – Way of choosing which AZ you want to go to.
- Capacity Reservation –
- IAM Role – To allow access to other AWS services to access this EC2 instance.
- Shutdown Behavior – What happens to the EC2 instance when OS level restart occurs.
- Enable Termination protection – Enable it to prevent accidental deletion of EC2 instance. You will have to disable this feature on EC2 instance to be able to delete it via API or AWS Management console.
- Monitoring – To enable Cloud Watch Monitoring of this EC2 instance. By default cloud watch monitors EC2 instance every 5 minutes which is also configurable to lower value.
- Advanced Details – Where you can pass boot strap scripts.
Step 6
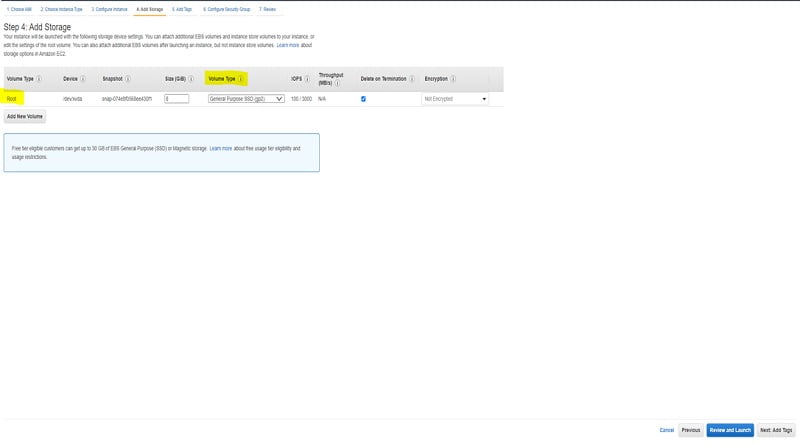
On this screen you select the root device volume for your EC2 instance, click “Add Tags”. You can also attach EBS volumes to EC2 instances by Clicking on Add New Volume.
Step 7
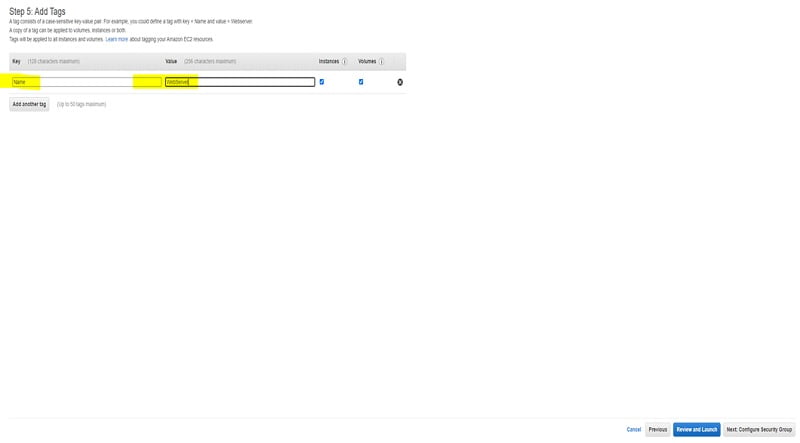
On this screen add Tags to your instance for description purposes & Click Configure Security Group
Step 8
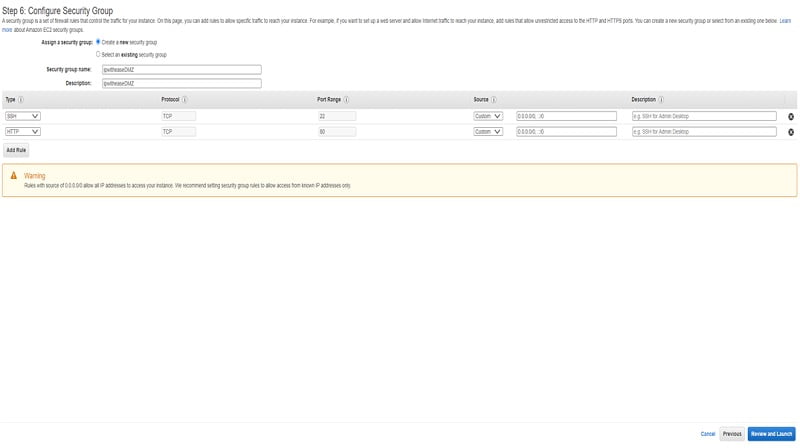
On this screen you create a security group and allow only certain port & subnet traffic to your EC2 instance. You have to add rules to allow the access. For example, if you want to set up a web server and allow Internet traffic to reach your instance, add rules that allow unrestricted access to the HTTP and HTTPS ports.
Step 9
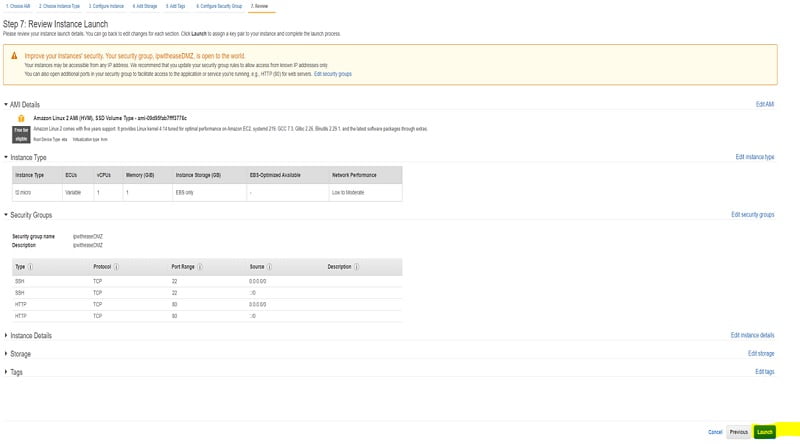
Next, Click Review and Launch. You review the settings made so far and Click on Launch Instance.
Step 10
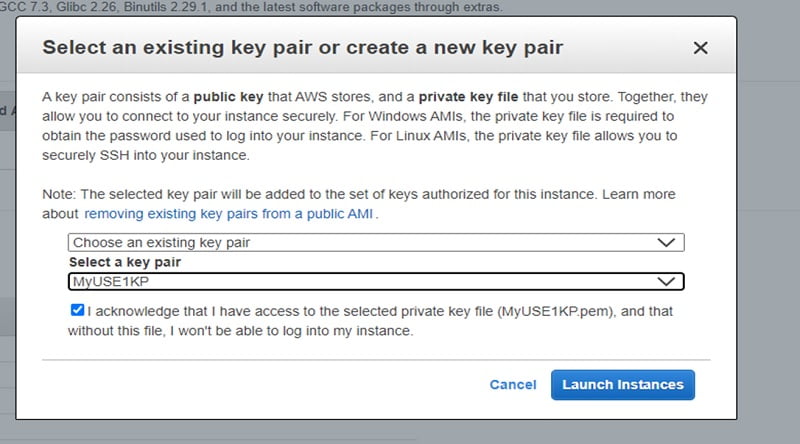
Next you will be popped to select your public key pair. You will need to create a new key pair and download the private key file to your laptop from which you are trying to access the EC2 instance. Once done Click on Launch Instance.
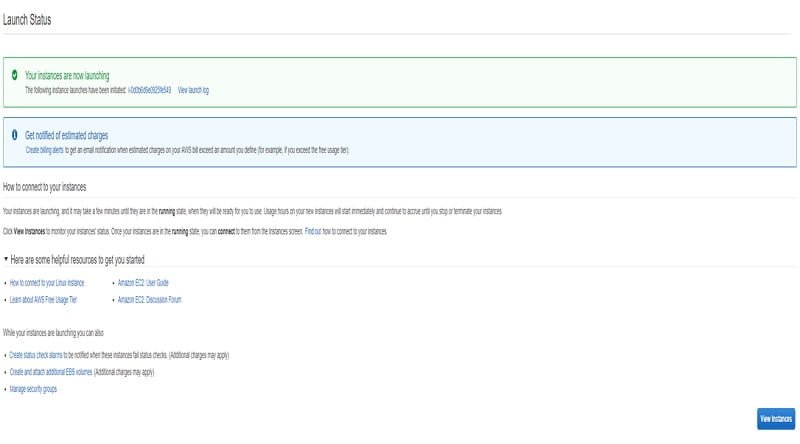
You will get the following screen, Click View Instances to be able to see your instance.
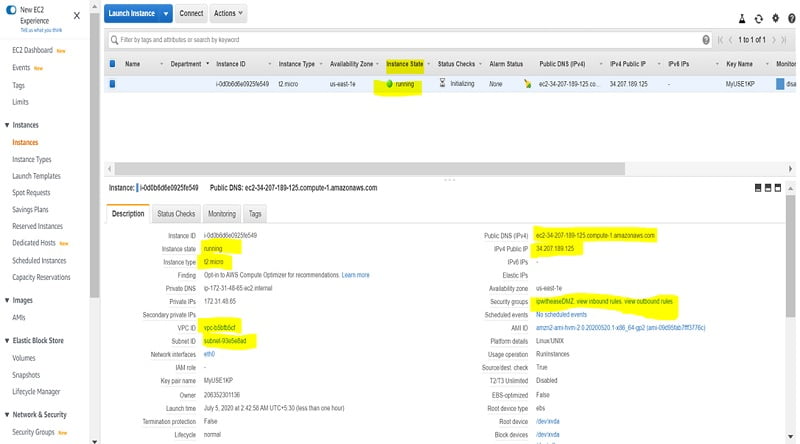
You will see you EC2 instance created as below:
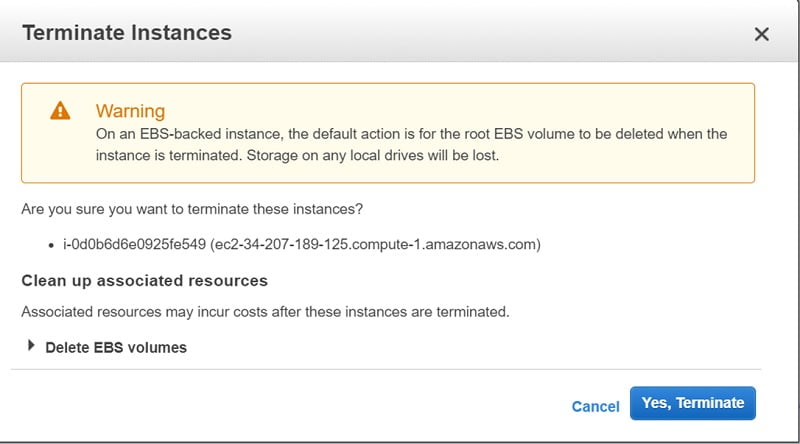
In order to delete the created instance, browse to Actions > Instance Settings > Click Terminate
Are You Preparing for an Interview
Top 100 AWS Interview Questions
ABOUT THE AUTHOR

I am here to share my knowledge and experience in the field of networking with the goal being – “The more you share, the more you learn.”
I am a biotechnologist by qualification and a Network Enthusiast by interest. I developed interest in networking being in the company of a passionate Network Professional, my husband.
I am a strong believer of the fact that “learning is a constant process of discovering yourself.”
– Rashmi Bhardwaj (Author/Editor)

