Table of Contents
Frequently, there is a need to capture the screen during a presentation or video playback. The reason may be for tutorials and demonstrations of concepts, documentation purposes, or else content creation. Keep reading this article to learn how to record a screen on a Mac using built-in utilities and third-party software.
Screen Record on Mac with Built-in Tools
Using Screenshot Toolbar
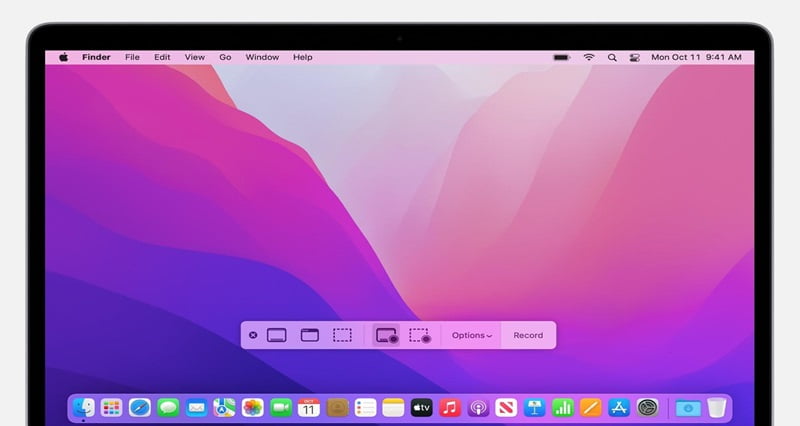
For recent macOS (Mojave or later), you can use the Screenshot Toolbar for screen recording.
- Open the Screenshot Toolbar by pressing >> Command + Shift + 5.
- Pick the recording type.
- The recording will start immediately on your screen.
- Click “Stop” to finish the recording.
Using QuickTime Player
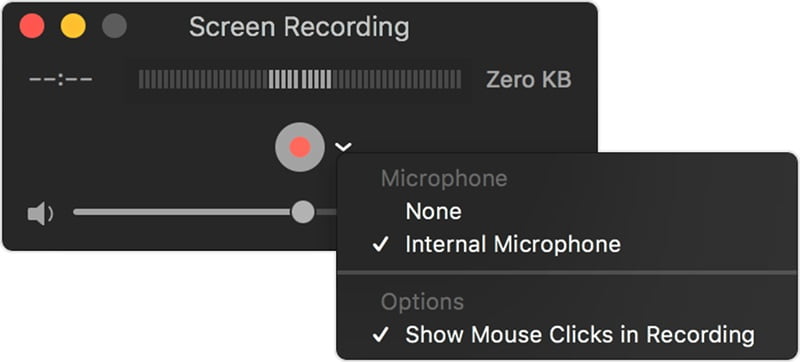
For older macOS versions, you can use QuickTime Player for screen recording on a Mac.
- Open QuickTime Player
- Click New Screen Recording under the Menu Bar.
- Select your audio input source and Click the Record button to start recording.
- Click anywhere on the screen to record the entire screen. For only capturing a subset of the overall screen, drag the cursor in that area and then click “Start Recording”.
- Once the required recording is complete, press the “Stop” button in the Menu Bar, or else press simultaneously the following keys – “Command + Control + Escape”
It’s essential to note that QuickTime is compatible with older macOS versions while the Screenshot toolbar is not.
Screen Record on Mac with Third-Party Software
If you are looking for dedicated software for screen recording then Movavi Screen Recorder is one of the best options. It is compatible with all Mac devices. It is capable of both capturing a video and recording the screen with a single click. It also offers built-in tools for customization, trimming, and adjusting recording parameters that make this tool very helpful for webinars, online events, video streaming, etc.
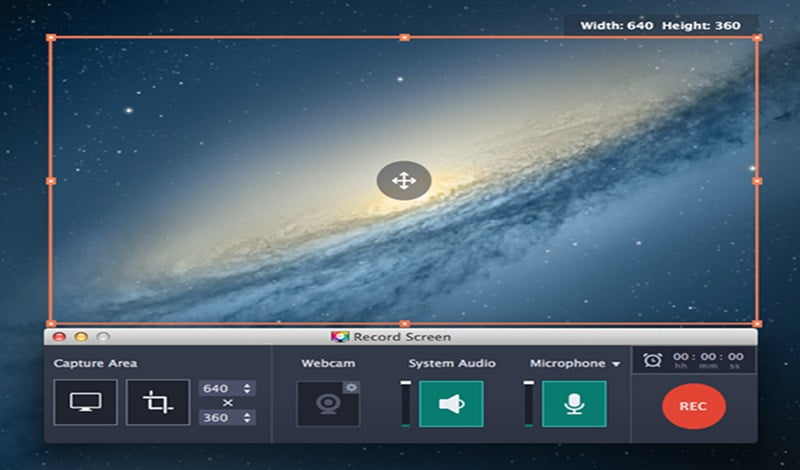
Step 1. Installation
Download Movavi Screen Recorder and follow the installation instructions.
Step 2. Select Recording area
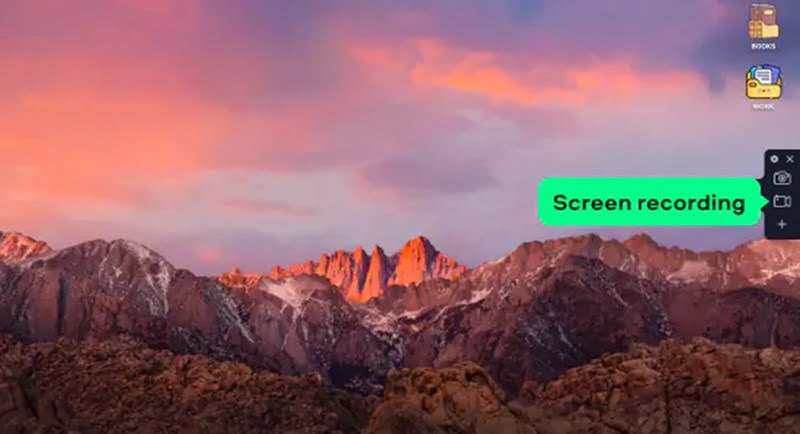
Press the video camera icon on the sidebar and position the cursor to capture a particular frame of the screen.
Step 3. Start Recording
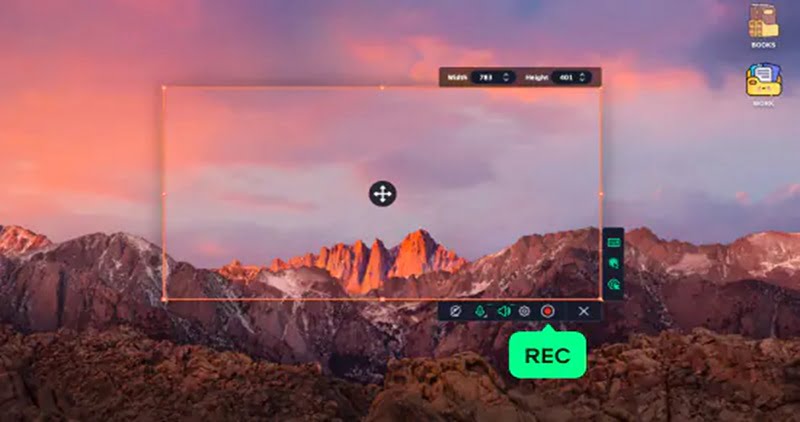
Click the REC button to start the screen recording on Mac. You can pause or resume recording using the hotkeys
Step 4. Editing
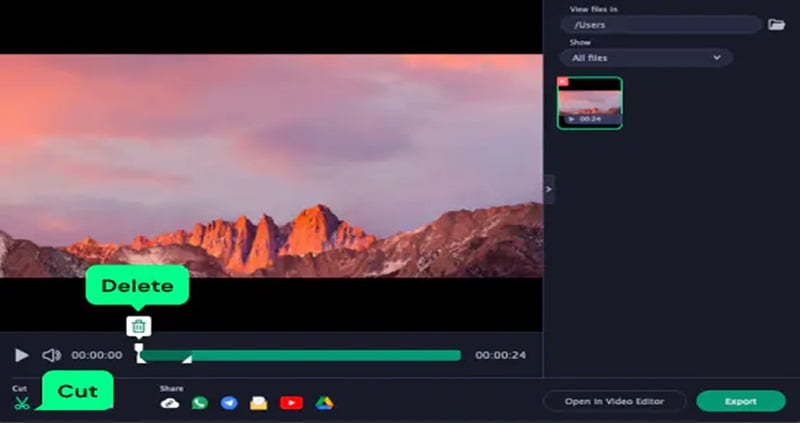
Editing is an optional step. Click the Scissors icon to cut and white markers to delete the selected portion using the trash bin icon.
Step 5. Saving the final video
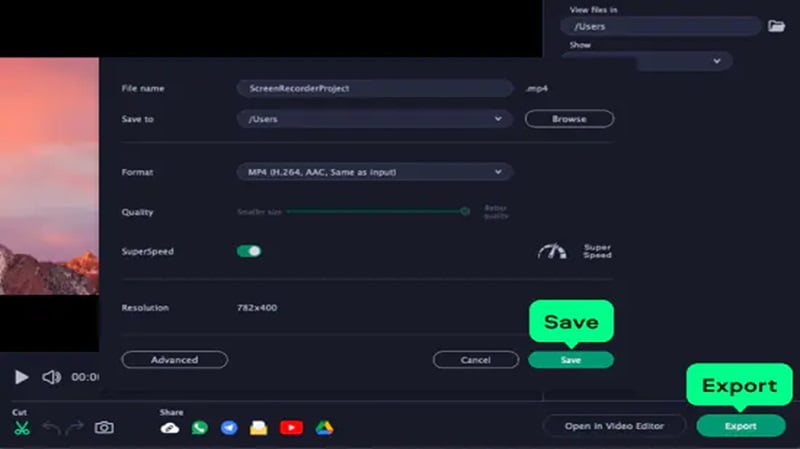
Press “export” to save the file. Name the file, select the folder, and choose the format (MP4, MOV, etc.) to locate the file easily later. Finally, “SAVE” the file to complete the process.
Movavi Screen Recorder Review
Now, let’s look closer at the key features of Movavi Screen Recorder, and its pros and cons.
Key Features of Movavi Screen Recorder
- Option to Record the webcasts with or without inclusion of audio stream
- Customizable webcam preview with the option to change its size and shape
- Capturing the system sound, mic, feeds of speaker clean and noise-free
- Displaying keystrokes and mouse movements, and drawing right on your screenshots and videos while recording live
- Scheduling feature for recording at any given time and watching later.
- Saving the recordings in a variety of file formats.
- Sharing links on the videos or uploading on the cloud and social media
Pros & Cons
Pros
- A convenient and easy-to-use tool: intuitive interface
- HD and 4k grab of screen
- Prompt creation of customizable footage videos: customizable recording areas and scheduled recordings
- Partial editing and scrolling choices are available
- Supported on both Windows and Mac computer
Cons
- Limited free version: requires a wider array of advanced features
- Rare issues in performance: can be demanding on system resources during high-quality recording
- The long-term use of Movavi Screen Recorder may require a purchase, which may not be suitable for all budgets.
Movavi Screen Recorder Price
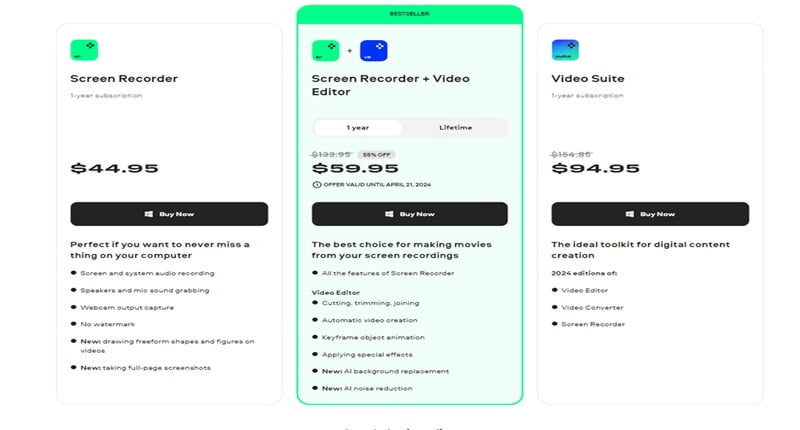
Movavi provides various pricing options to cater to different needs and budgets. The basic Screen Recorder plan starts at $42.95. For more comprehensive features, users can step up to the Screen Recorder + Video Editor plan. The Video Suite plan combines all programs and effects in one bundle.
Final Verdict
Some of the quintessential aspects of Movavi Screen recording solution are:
- Ease of usage
- High & Superior-grade output
- Exemplary screen resolution
Movavi Screen Recorder helps to create webinars, gameplays, or even tutorials. Its simple-to-use feature set allows you to quickly create high-definition video content. Notably, the product is far more worthy of the associated cost when compared to free alternatives. The multi-folded value one earns from the product includes timesaving and unmatched high-quality content.
Conclusion
Recording your screen on a Mac can be efficiently done using built-in tools like the Screenshot Toolbar and QuickTime Player, or with third-party software such as Movavi Screen Recorder. Each method offers its own benefits and features, catering to different user needs. Movavi Screen Recorder, in particular, stands out for its ease of use, high-quality output, and various customization options.
ABOUT THE AUTHOR
IPwithease is aimed at sharing knowledge across varied domains like Network, Security, Virtualization, Software, Wireless, etc.


