Table of Contents:
Today we look more in detail about Automatic Private IP Addressing (APIPA) common issues and how to troubleshoot them?
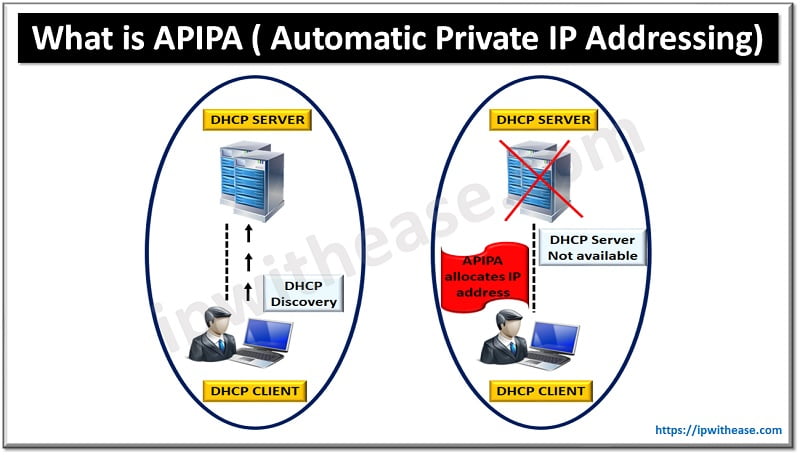
Windows feature of IP address assignment referred as Automatic Private IP Addressing (APIPA) at operating system level. Used when Dynamic Host Configuration Protocol (DHCP) server is not available. APIPA enables devices to communicate with each other in a network without having a DHCP server in the network for IP address assignment. When Microsoft Windows systems boot and find no DHCP server in the network it automatically assigns itself an IP address from a specific range (169.254.0.1 through 169.254.255.254). This is a reserved range for APIPA and not used by any device on the Internet.
Related: What is APIPA?

APIPA: Common Issues & Troubleshooting
APIPA has few drawbacks such as it can only work on Microsoft Windows operating systems. Devices running on other operating systems cannot use APIPA for IP address assignment. At times APIPA creates address conflicts if there are multiple devices on the network assigned IP address randomly using APIPA , two or more devices might be assigned the same IP address which could cause network connectivity issues.
Scenario: System is assigned 169 IP Address
One possible scenario could be the system is assigned 169 IP address and not able to browse the Internet.
To access the Internet, it is required that the system should have a valid IP address. When a system cannot communicate with a DHCP server then Automatic Private IP Addressing (APIPA) kicks off and assigns the system an IP address which starts with 169.254. The APIPA Ip address is useful only for peer-to-peer communication and not for the Internet. To fix the 169 error you have to take number of steps as under:
- Turn off and unplug modem and router, and plug both devices back
- You can also use windows networking troubleshooter to resolve networking issues
- Try to release and renew IP address from command line (CLI)
Ipconfig/release

Ipconfig/renew
Step 1 : Click on Start and type Run.
Step 2: Inside Run, type ipconfig /release to release the IP address.
Step 3: Then after the IP address is released, type ipconfig /renew
Restart the System
Check firewall settings and turn off firewall.
If the system does not change 169.254 addressing then assign static IP to it as per network address of DHCP server. Use below commands to clear / flush entries
ipconfig /flushdns

netsh winsock reset
Disable Ethernet Adapter
Step 1: Click Start and Right Click My computer. Then Click on Manage
Step 2: In Device manager 🡪 network adapters
Step 3: Under network adapter , right click on Ethernet adapter and choose disable
Step 4: Wait for 5 seconds and with right click – Re-enable
Step 5: Restart DHCP client
Check physical connectivity (Ethernet cable) – sometimes a bad Ethernet cable can also cause your system to receive 169 error.
Restart QoS Packet Scheduler Protocol
Step 1: Click on start and control panel
Step 2: In control panel; double click connections and choose local area connection
Step 3: Click on properties and uncheck QoS Packet scheduler
Step 4: Click ok and repeat process
Restart the DHCP Service
Step 1: Click start and choose Run
Step 2: Type services.msc in run and click ok
Step 3: Find DHCP service and right click. Click on Stop
Step 4: Reboot the system
Step 5: Click start 🡪 Run type netsh int ip reset log.txt and click ok
System Restore
Step 1: Open start 🡪 programs 🡪 Accessories
Step 2: Click on system tools
Step 3: Click on System restore and choose a restore point when you did not experience the problem
Step 4: Restore the system
For Windows 7 and Windows Vista instead of disabling Ethernet or wireless network adapter try to uninstall and reboot the system in case the system automatically detects and installs network drivers.
ABOUT THE AUTHOR

You can learn more about her on her linkedin profile – Rashmi Bhardwaj


