Table of Contents:
The Angular framework helps construct desktop and mobile web apps. Millions of developers use Angular to create engaging UIs. The open-source front-end web app framework Angular uses JavaScript. It is ideal to hire an AngularJS development company to plan and start on a software project.
Key elements of Angular
When using Angular, the RxJS coding library is essential. The primary goal of RxJS is to manage asynchronous data with several events. Thus, this reactive programming toolkit enables developers to create numerous channels for data exchange to reduce resource usage. RxJS is essentially a conveyor for JavaScript programs. It allows for the concurrent and continuous execution of events separately without waiting for one event to finish before starting another. RxJS has a steep learning curve.
The Angular CLI is its next fantastic feature. It has various built-in testing tools, and its commands are pretty straightforward.

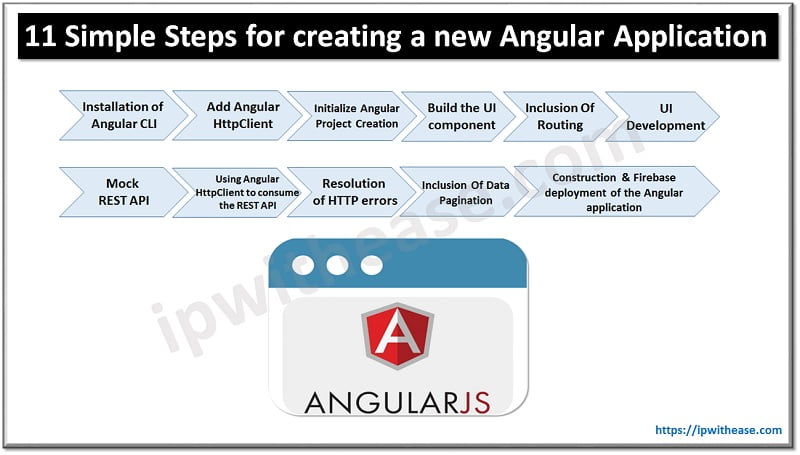
What are the steps to build an Angular application?
An individual or a business can hire AngularJS developer who can follow these steps with the right expertise and experience.
1. Installation of Angular CLI
Become familiar with the Angular CLI as the first step in building an Angular application. This step is essential because the official tool for starting and running Angular projects is the Angular CLI.
2. Initialize Angular project creation
The first step is to initialize the Angular project. The CLI may then present the developer with a prompt asking if the Angular routing is required. The CLI would then provide an additional prompt to assist in choosing the format for the stylesheet. This prompt comes next. Select CSS from the menu.
Angular should be able to create the necessary files and folders and set up the essential packages from npm. It may also automatically set up the route stated previously.
The developer must then open the local development server by going to the root folder. Subsequently, it would make the relevant application accessible with an address URL. The developer needs to access it by using a web browser.
3. Add Angular HttpClient
The developer must navigate to the file src/app/app.module.ts and make a few changes in the code. It is to load the HttpClientModule and add it to the import array to ensure that the HttpClient consumes the REST API.
4. Build the UI component
The developer should launch a new terminal and write specific codes to complete the UI component. Angular applications are composed of components. You can choose among the top Angular IDEs.
5. Inclusion of routing
It is another step that requires a lot of coding, yet it is essential since it should specify how the empty path diverts to the home component. The home page automatically redirects to first-time users in this specific sequence.
6. UI development using components of Angular Material
There is a coding line to add by navigating to the root file of the project. Following that step, Angular shall advise the developer to select a project theme. The popup may ask if the developer wants to configure HammerJS for gesture recognition and browser animations. Here the developer has to press Enter to continue. The developer adds buttons, headers, loading icons, and so forth.
7. Mock REST API
There are numerous little steps to complete. It starts by switching to a newer CLI and adding the JSON-server package from npm to the project. A few lines of code follow this step to get to the new REST API.
8. Using Angular HttpClient to consume the REST API
The developer should use HttpClient to have Angular use the REST API. The first step in this procedure is to build an Angular service that shall include the code and allow access to data through the REST API server. A series of code lines follows as the next step.
9. Resolution of HTTP errors
The developer has a series of coding lines to include in the src/app/api.service.ts file. Afterwards, it shall display the errors in the browser console.
10. Inclusion of data pagination
The developer adds data pagination support with the HTTP response’s Link header that retrieves from the REST API server. As a result, the developer must advise HttpClient to provide the entire HttpResponse rather than just the response body. Now, a series of coding lines are input to update the application home component and the template.
11. Construction and Firebase deployment of the Angular application
The developer needs to get to the CLI. The project’s root folder is required because the developer must execute a command to enable Firebase deployment for the software project.
The CLI may prompt you to enter the authorization code. Signing into the Google account connected to the Firebase account is required to input the authorization code. The CLI may then ask to choose a project after it is over. Afterwards, CLI refreshes the angular.json file and constructs the firebase.json and .firebaserc files as necessary.
The developer can now use the command to publish the app to Firebase hosting. It completes the development of the Angular Project and outputs a new application.
Conclusion
Anyone can always seek an AngularJS development company for custom mobile app development. It makes the task easy and with minimal errors and proper maintenance. If an individual wants to master Angular, he/she can unlock an array of limitless options for developing apps, regardless of their initial complexity. If you are looking for the second option then you can choose knockout.
Continue Reading:
How to Create and Use Alias Command in Linux
ABOUT THE AUTHOR
IPwithease is aimed at sharing knowledge across varied domains like Network, Security, Virtualization, Software, Wireless, etc.


