vCenter is a centralized management platform used to manage a set of VMs , ESXi hosts and other components from a single centralized location.
vCenter Server can be deployed in three forms-
- On a windows VM.
- On windows physical server
- As vCenter server appliance
vCenter Server Appliance is a pre-configured Linux Virtual Machine which is optimized to run a vCenter server. The appliance is imported to an ESXi host and is run through a series of installation steps through GUI.
vCenter Server 6.7 can manage ESXi version 6.0 or 6.5 hosts in the same cluster with ESXi 6.7 hosts. vCenter Server 6.7 cannot manage ESXi 5.5 or earlier hosts.
Steps to install vCenter 6.7 server appliance –
Step 1: Download the ISO file for vCenter server appliance at my.vmware.com.
If you have a VMware license then you can simply download else you will need to create an account on VMware website and download a evaluation version of VCSA which will be valid for 60 days.

Step 2: Once the ISO file is downloaded extract the file and then browse to following path:
VCPA\vcsa-ui-installer\win32
Look for a file named installer as below:
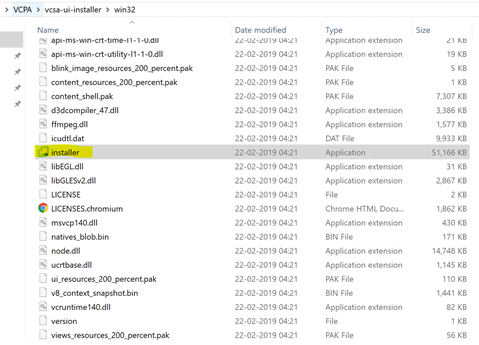
Step 3: Double click on the installer file and you will get a screen as below with installation options
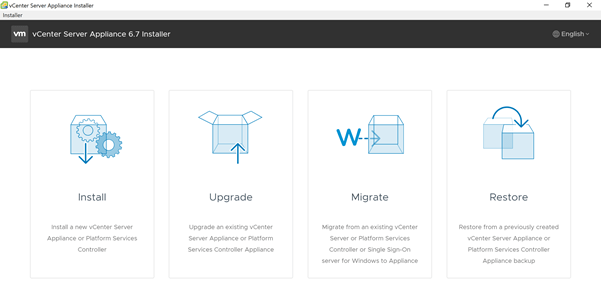
You see you get option to install a new VCSA or upgrade/migrate etc. from the previous versions of the VCSA.
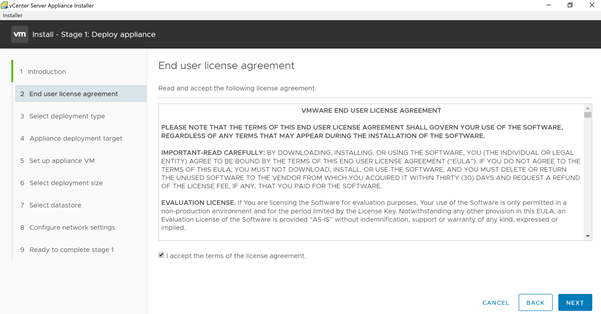
Step 4: Click on install since we are doing a fresh install

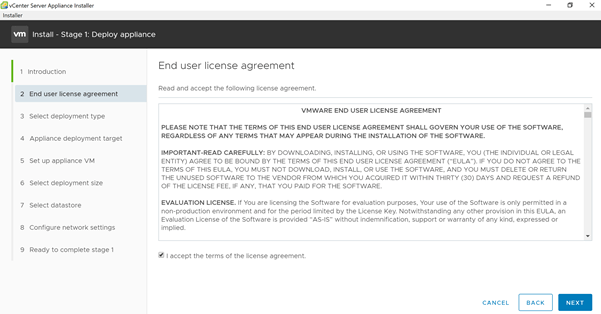
It is just general introduction and on this page click next and you get a End user license agreement. Agree to that as well and click next.
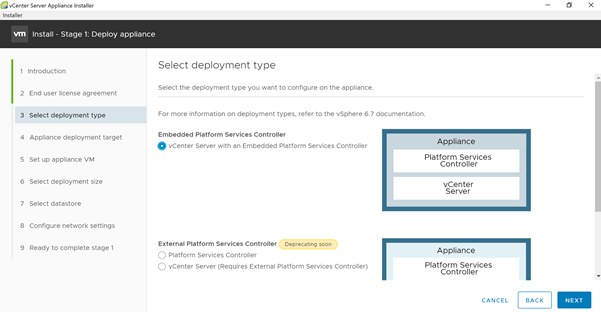
Step 5: Under the deployment type select Embedded Platform Service Controller since in lab we don’t have many ESXi host to manage. If there are multiple ESXi hosts to manage you may go for External PSC option. Click Next.
Step 6: Enter the details of the ESXi host on which you will host this VCSA VM. Give a username and password for VCSA. Click Next.
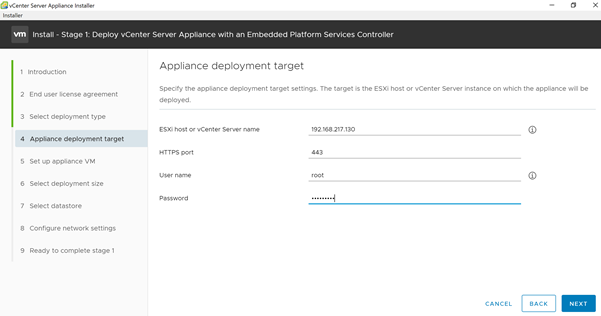
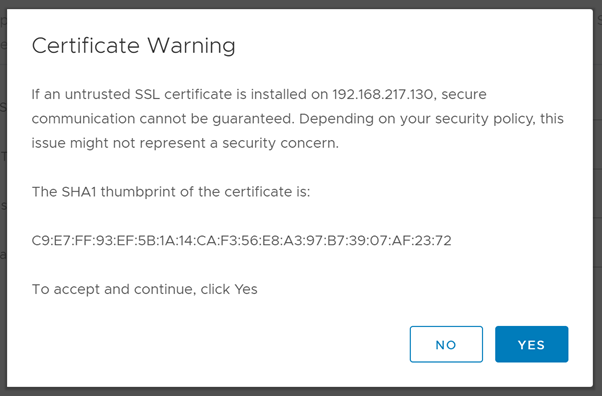
It gives a certificate warning. Click Yes.
Step 7: Set the VCSA VM name and root credentials. Click Next.
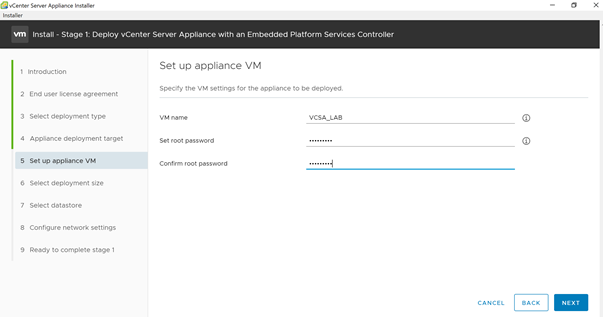
Step 8: Select deployment size as per need and click Next
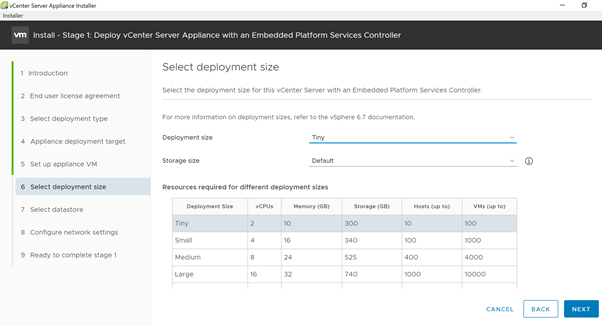
Step 9: Select a data-store and click Next

Step 10: Give the network settings for the VCSA VM depending on your environment and Click Next.
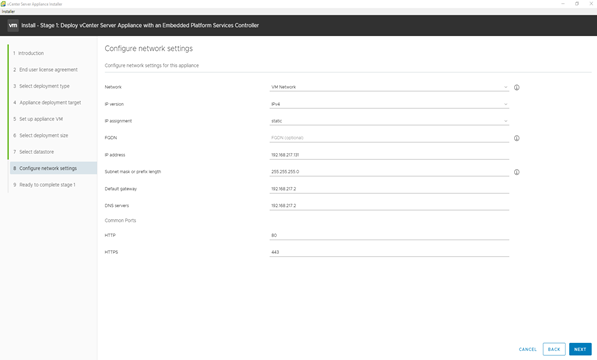
Step 11: Review the Final Configuration and Click Finish.
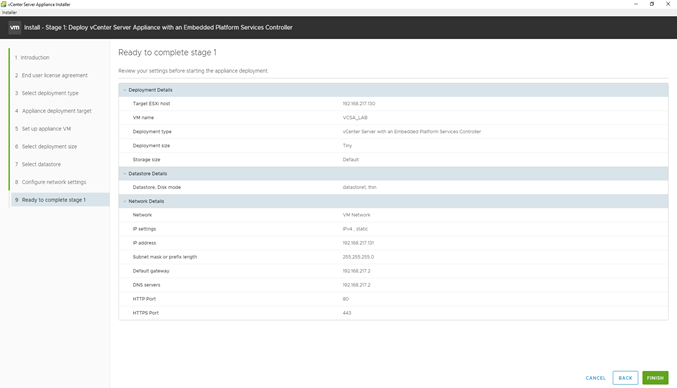
As you click finish an installer starts the installation of VCSA VM

It will take around 10-15 minutes for the installation to complete and then on below screen click Continue:

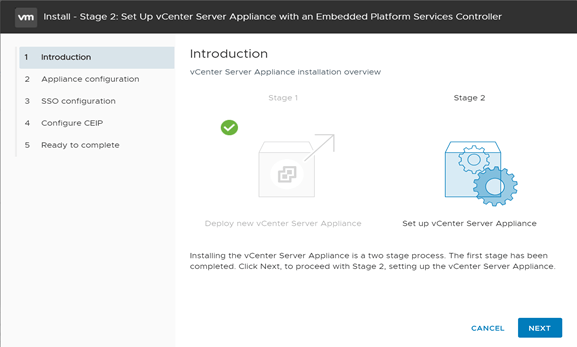
Step 12: Setup vCenter Server Appliance with Embedded PSC. On this screen click Next.
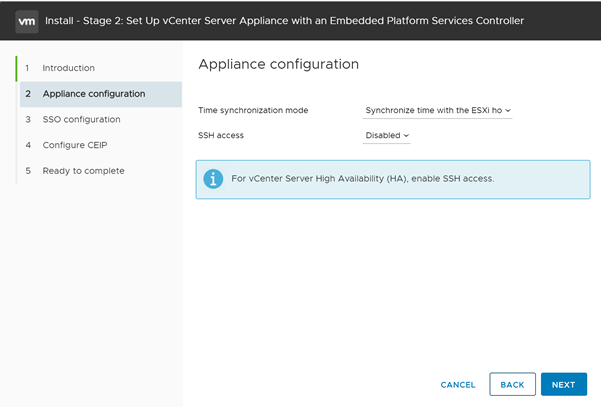
Step 13: Select Time Sync Mode as “ Sync Time with ESXi host” if you don’t have a NTP server in your environment. Click Next.
Step 14: Configure the SSO settings and Click Next
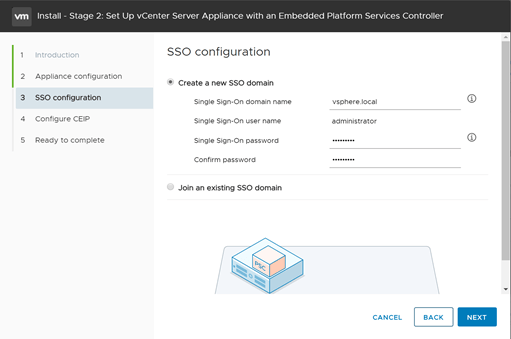
Step 15: Select whether you want to join Customer Improvement Plan or not and Click Next

Step 16: Verify all the settings and Click Finish.
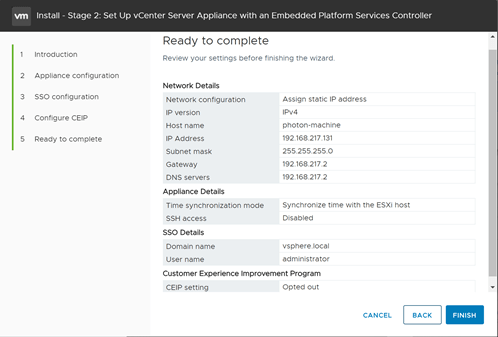
A pop-up window comes up indicating once this process in started you cannot stop it.
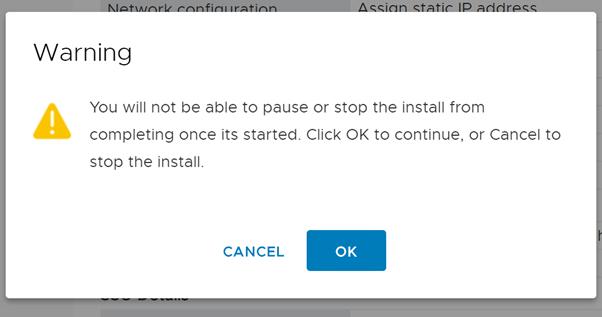
Click OK to Proceed.
Installer kicks in as below:

Once the installation is complete you can access the vCenter via vSphere Client at IP of VCSA 192.168.217.131 which we assigned.


