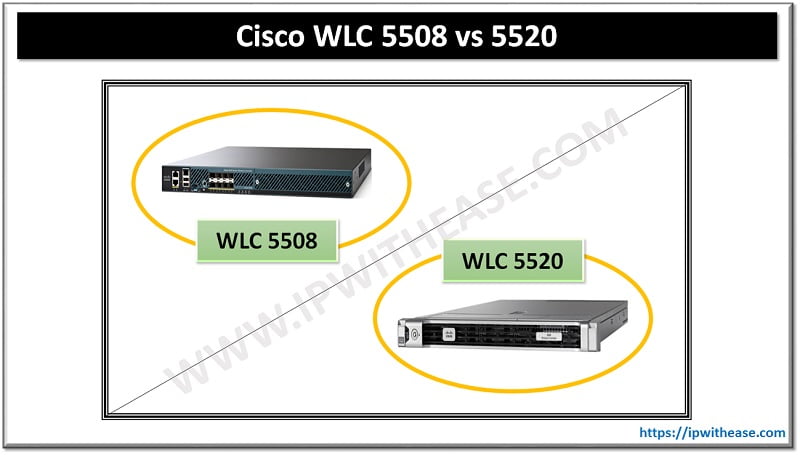
The following procedure shows how to create a WLAN on WLC.
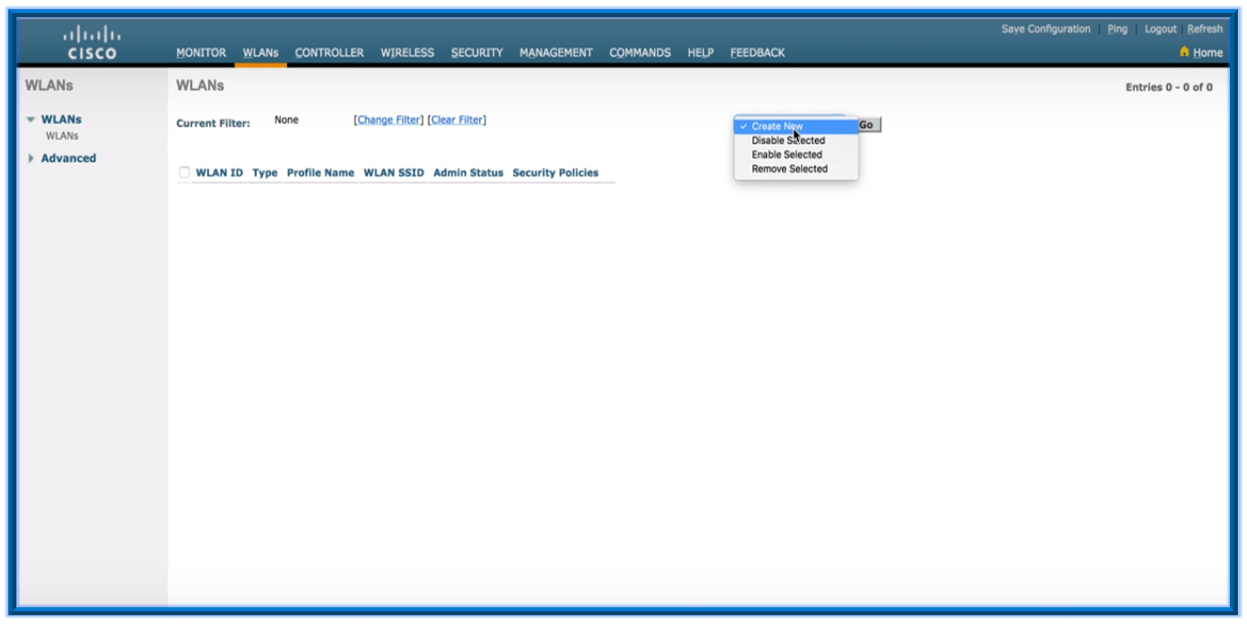
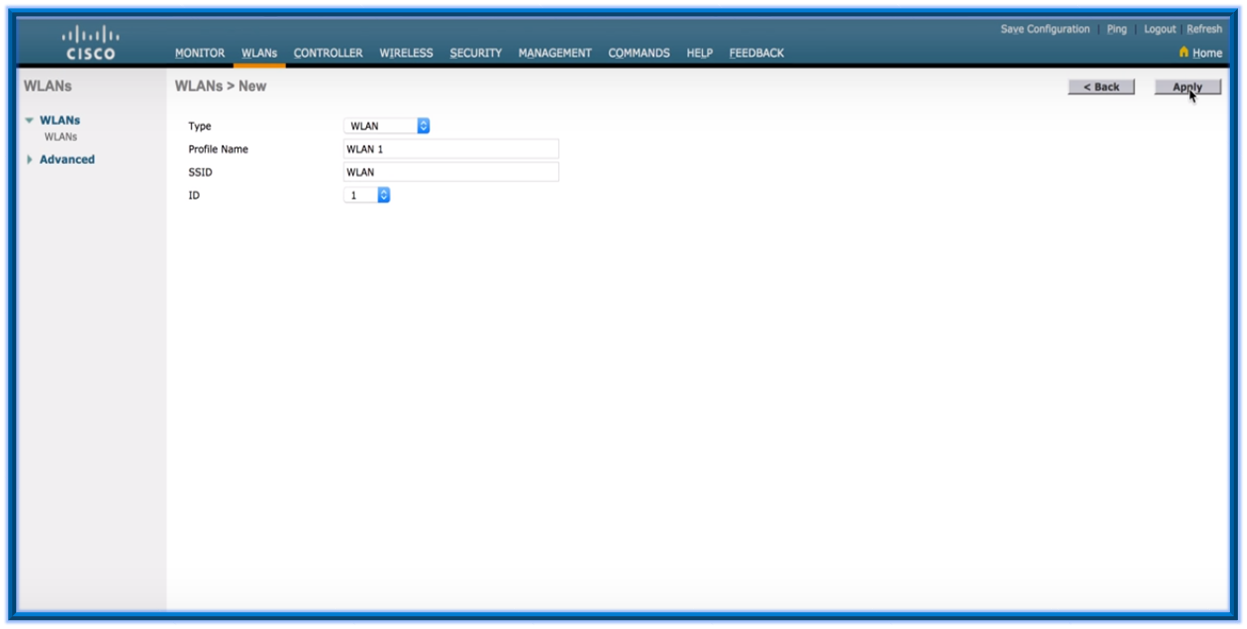
Select the WLAN Tab and click on Create New -> Click on Go
Type the Profile name and SSID name -> Click on Apply
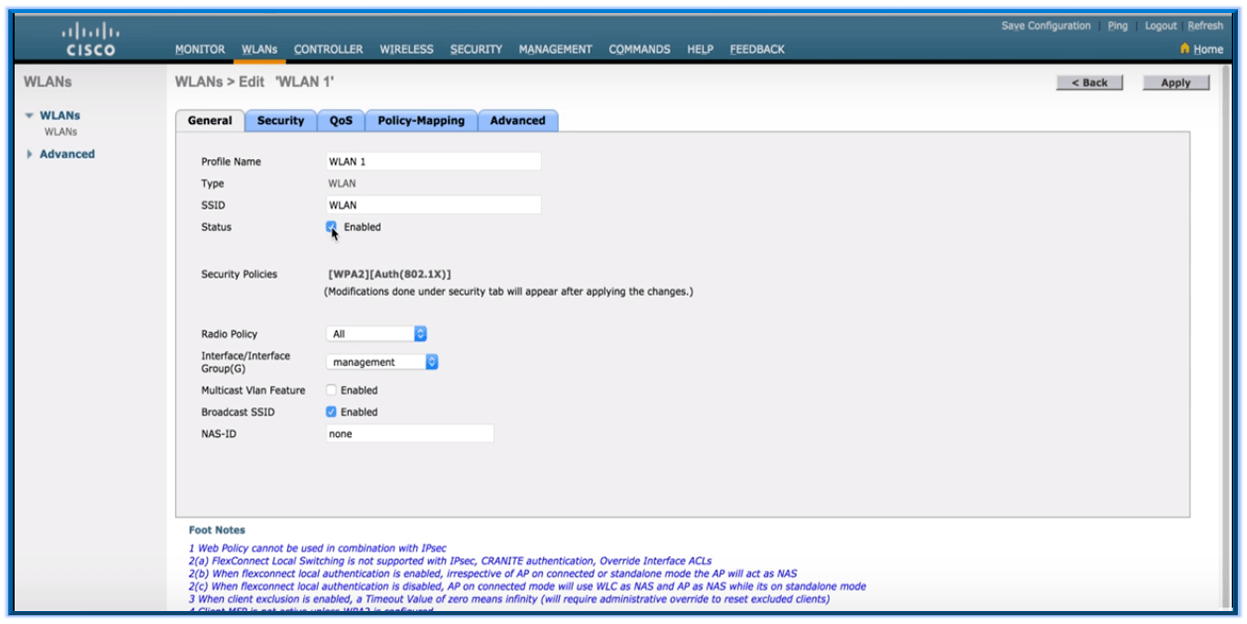
Select to enable the WLAN Status and Broadcast the WLAN on the General Tab:
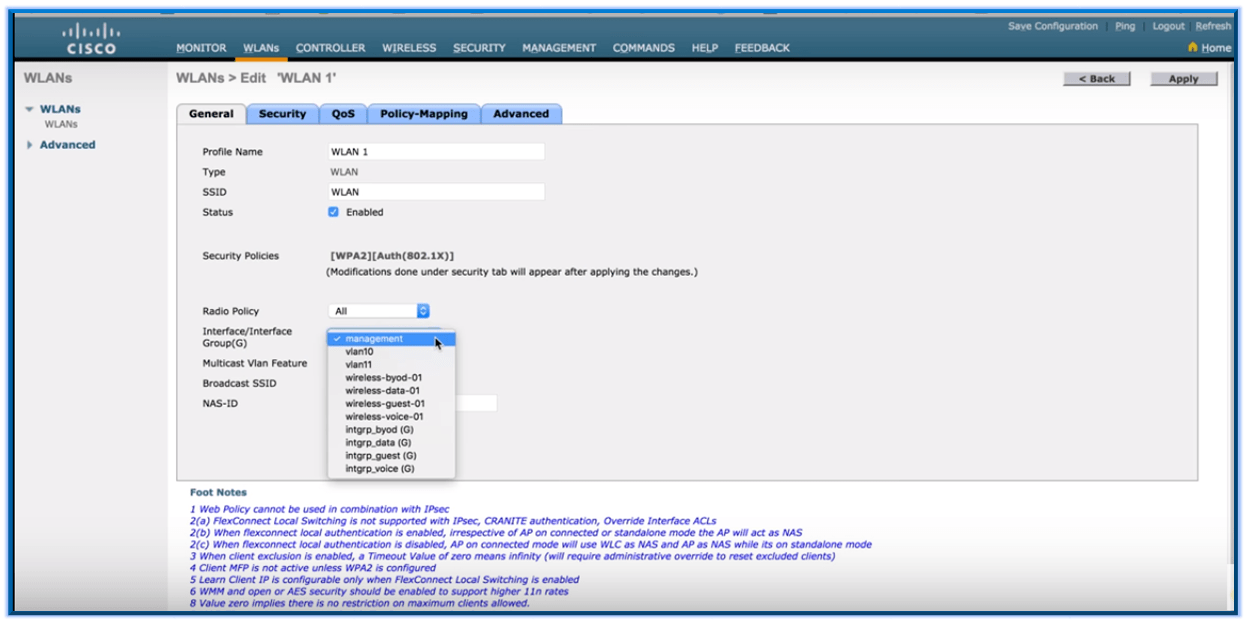
Select the interface to be used to send the User traffic for the WLAN:
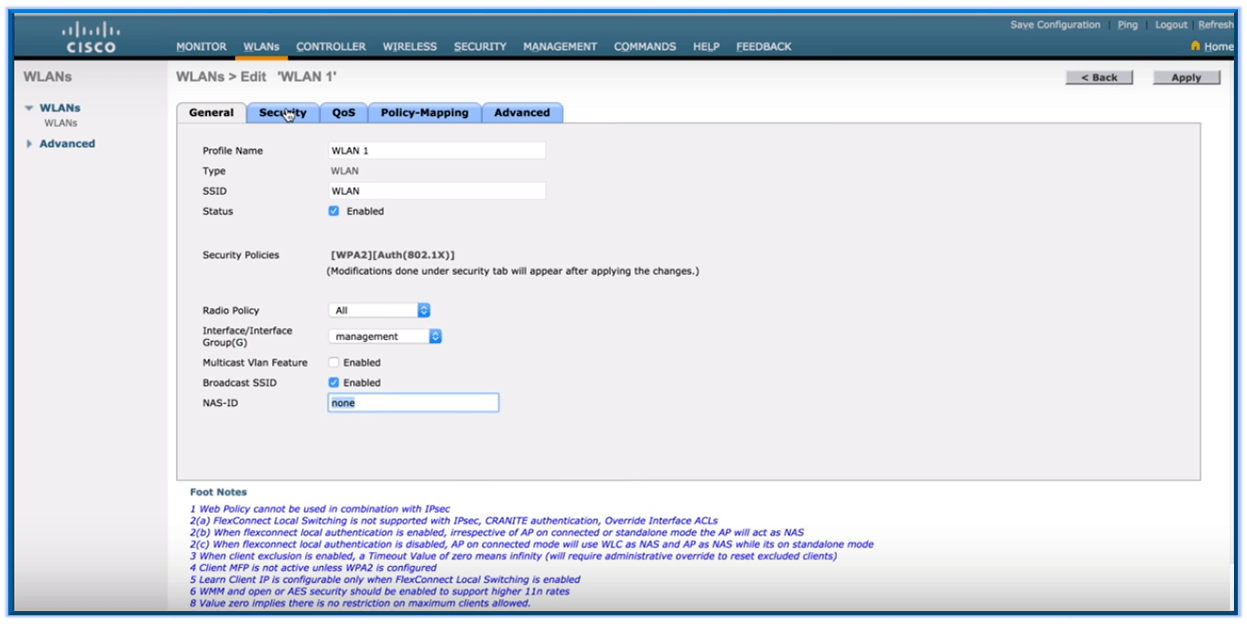
Click on the security Tab to implement the security on the WLAN:
Incase , if any Layer 2 security has to be implemented then choose the” layer 2 security” to be used from the dropdown menu
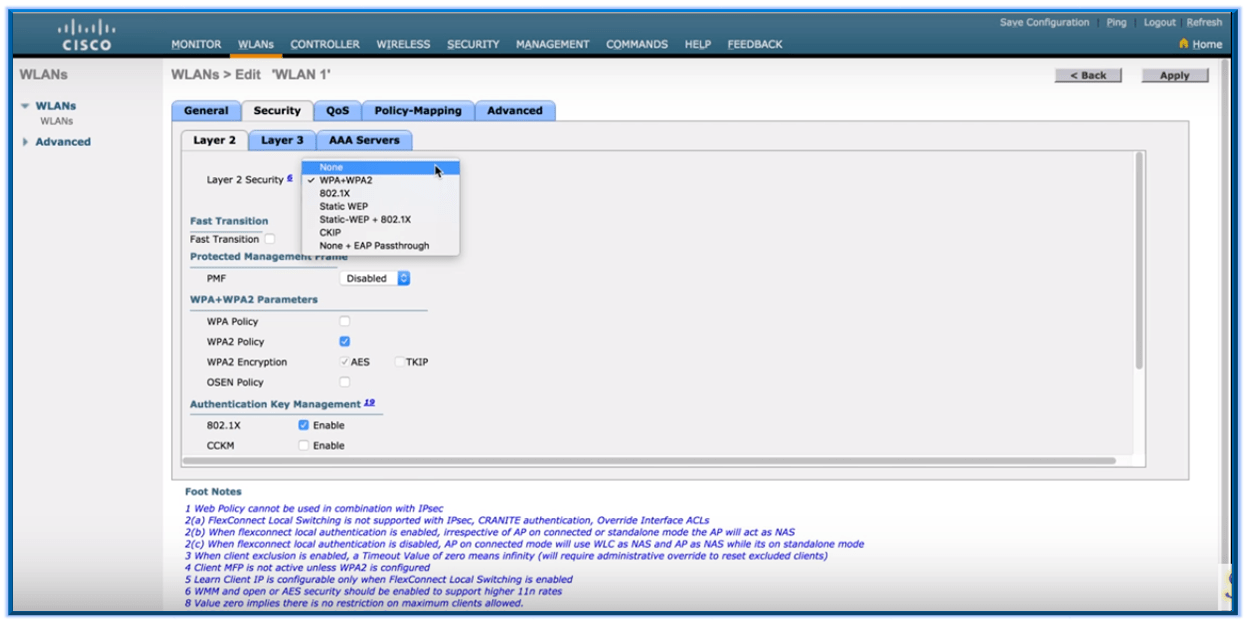
Choose “None” if the WLAN is to be kept in Open Security else choose as required. For e.g. If creating a Guest SSID and implementing NO security to connect.
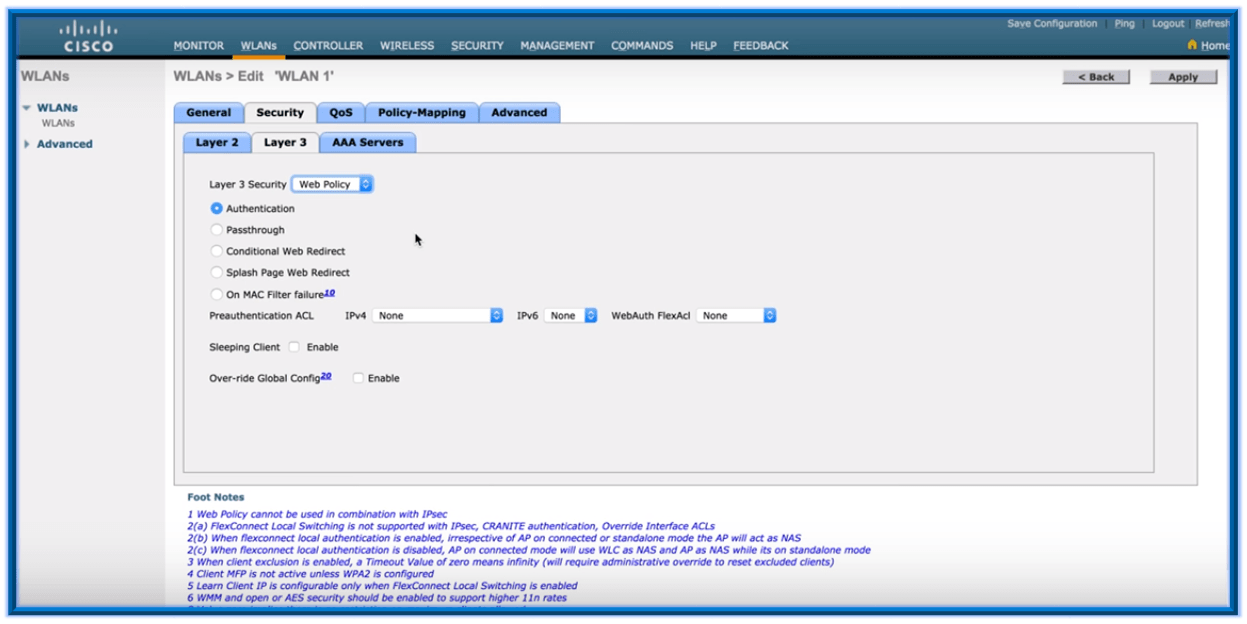
If Layer 3 security has to be implemented then click on Security Tab under the WLAN you want to edit on and then click on Layer 3 Tab. Select the appropriate option
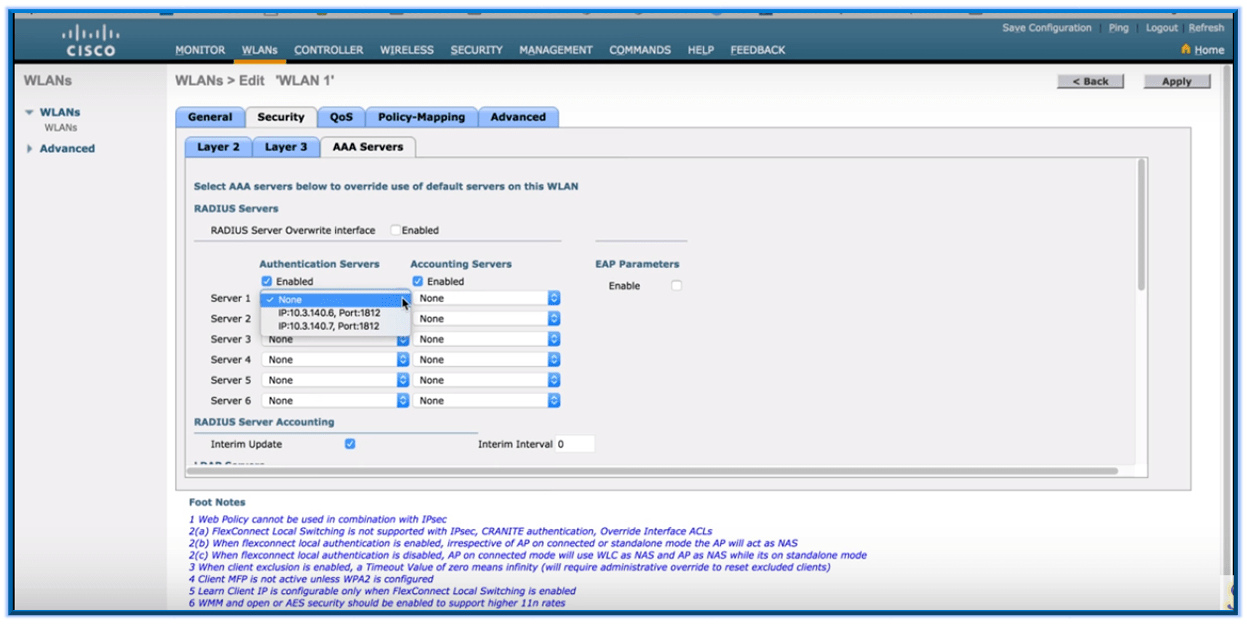
Choose the appropriate Radius server from the dropdown menu (Before this, a radius server need to be configured under the Security Tab.). Click on AAA tab under the security option and select the radius server.
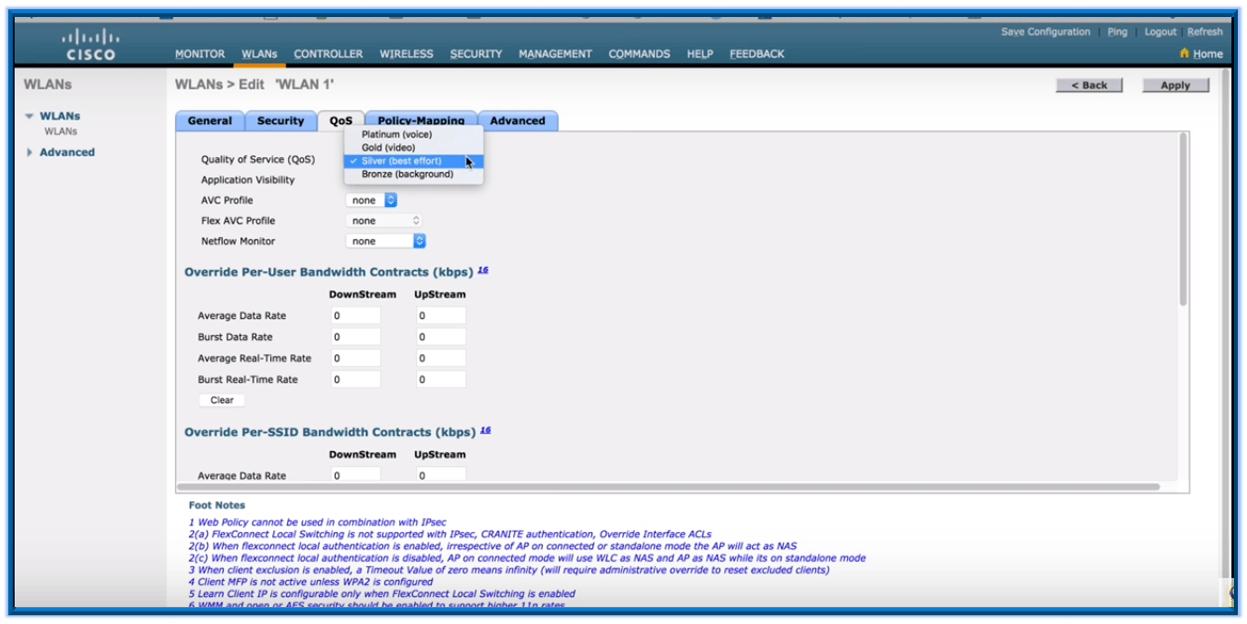
Incase the QOS feature to be enabled on the WLAN, then go to the QOS Tab and select the required QOS service to be implemented from the Drop down menu.
From the Policy Mapping Tab you can choose the policy to be used.

From the Advanced Tab option select the required options. For e.g. if DHCP server has to be defined for the WLAN, it can be defined here.

ABOUT THE AUTHOR

You can learn more about her on her linkedin profile – Rashmi Bhardwaj

