Table of Contents
This blog discusses the step by step process to enable GUI Access on Fortinet firewall and related troubleshooting scnarios.
Fortigate Next-Generation Firewalls (NGFW) run on FortiOS. There are various version i.e. 6.4, 6.2, 6.0, 5.6, 5.2, 5.0. These firewalls can be managed via the CLI as well as via the GUI.
In this post, we will particularly focus on the steps to enable GUI access for an out-of-box Fortigate firewall.
Steps to Enable GUI Access on Fortinet Firewall
You can login to Fortigate firewall with default credentials as below:
Username: admin
Password: <No password>…Just hit Enter
Step 1
Configure the port1 or the port connecting to switch with a free IP address on your private network as below:
Fortinet_Lab # config system interface
Fortinet_Lab (interface) # edit port1
Fortinet_Lab (port1) # set ip 10.80.144.150/24

Fortinet_Lab (port1) # set allowaccess ping http https fgfm
    ssh SSH access.
    snmp SNMP access.
    telnet TELNET access.
    radius-acct RADIUS accounting access.
    probe-response Probe access.
    capwap CAPWAP access.
    ftm FTM access.
Fortinet_Lab (port1) # set allowaccess ping http https fgfm ftm ssh >> Remember to allow the https and http connection to firewall on this port. You can also allow other options to connect to firewall but those will need to be specifically allowed under each port where you want to connect from your network. For example we have allowed ping, ssh etc on firewall to this port (port1).

Fortinet_Lab (port1) # end
Step 2
Verify if the configurations under the port as below:
Fortinet_Lab # show system interface port1

config system interface

    edit “port1”

set vdom “root”

        set ip 10.80.144.150 255.255.255.0

        set allowaccess ping https ssh http fgfm ftm

set type physical

set snmp-index 1

next

end
Step 3
Configure the static default route or specific route towards the default gateway. In our lab topology we will configure the default route towards the gateway as below:
Fortinet_Lab # config router static

Fortinet_Lab (static) # edit 1

new entry ‘1’ added

Fortinet_Lab (1) # set gateway 10.80.144.1

Fortinet_Lab (1) # set dst 0.0.0.0/0

Fortinet_Lab (1) # set device port1

Fortinet_Lab (1) # end

Verify the route:

Fortinet_Lab # show router static

config router static

edit 1

set gateway 10.80.144.1

set device “port1”

next

end

Fortinet_Lab #
Step 4
Execute the Ping to default Gateway IP to ensure our route towards GW is working:
Remember to allowaccess ping if desired on the port whose IP you are using to ping GW IP like we did allow ping on Port1.

Fortinet_Lab # execute ping 10.80.144.1

PING 10.80.144.1 (10.80.144.1): 56 data bytes

64 bytes from 10.80.144.1: icmp_seq=0 ttl=64 time=0.7 ms

64 bytes from 10.80.144.1: icmp_seq=1 ttl=64 time=0.5 ms

64 bytes from 10.80.144.1: icmp_seq=2 ttl=64 time=0.5 ms

64 bytes from 10.80.144.1: icmp_seq=3 ttl=64 time=0.4 ms

64 bytes from 10.80.144.1: icmp_seq=4 ttl=64 time=0.5 ms

— 10.80.144.1 ping statistics —

5 packets transmitted, 5 packets received, 0% packet loss

round-trip min/avg/max = 0.4/0.5/0.7 ms
Step 5
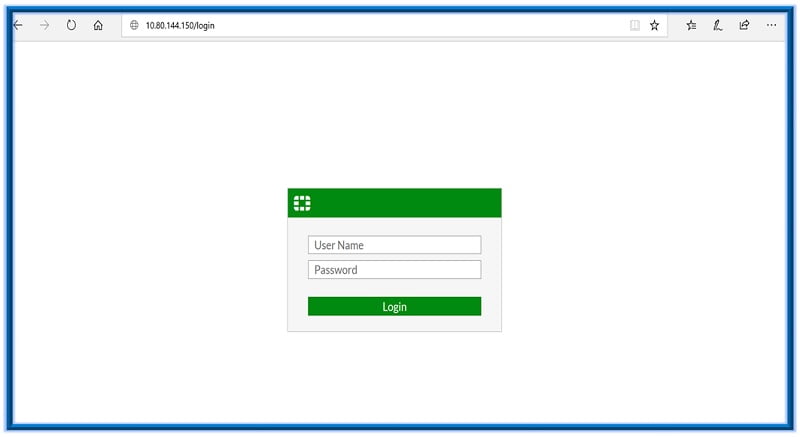
Try accessing the GUI page for Fortinet Fortigate at https://10.80.144.150 i.e. IP given to port1 in our example. You will get a screen as below. Login with default username and empty password here.

Related- Fortinet Firewall Interview Questions
Related FAQs
Q.1 How do I access the Fortigate Firewall GUI?
To access the Fortigate Firewall GUI:
– Connect your computer to the Fortigate device using an Ethernet cable.
– Open a web browser and enter the Fortigate IP address in the address bar (usually https://192.168.1.99 by default).
– Log in with your username and password (default username is “admin” and the default password is blank).
Q.2 What are the default login credentials for the Fortigate GUI?
The default login credentials are:
Username: admin
Password: (leave blank)
Q.3 How can I change the default IP address of the Fortigate Firewall?
To change the default IP address:
1. Log in to the GUI.
2. Go to Network > Interfaces.
3. Edit the internal interface (e.g., port1).
4. Change the IP address and subnet mask as needed.
5. Save the changes.
Q.4 What should I do if I can’t access the Fortigate GUI?
If you can’t access the GUI:
1. Ensure your computer is on the same subnet as the Fortigate device.
2. Check if the correct IP address is being used.
3. Verify network cables and connections.
4. Disable any firewall or security software on your computer temporarily.
5. Try using a different web browser or clearing your browser cache.
Q.5 How do I reset the Fortigate Firewall to factory settings?
To reset the Fortigate to factory settings:
1. Log in to the GUI.
2. Go to Dashboard > Status.
3. Select System > Advanced.
4. Click Reset.
5. Confirm the reset action. (Note: This will erase all configurations and restore the device to its original state.)
Q.6 How do I enable HTTPS access to the Fortigate GUI?
To enable HTTPS access:
1. Log in to the GUI.
2. Go to System > Settings.
3. In the Administration Settings, enable HTTPS.
4. Optionally, you can disable HTTP to ensure secure access.
5. Apply the changes.
Q.7 How can I change the admin password for the Fortigate GUI?
To change the admin password:
1. Log in to the GUI.
2. Go to System > Administrators.
3. Edit the admin user.
4. Enter the new password and confirm it.
5. Save the changes.
Q.8 How do I configure multiple admin accounts on the Fortigate Firewall?
To configure multiple admin accounts:
1. Log in to the GUI.
2. Go to System > Administrators.
3. Click Create New.
4. Fill in the required details (username, password, and admin profile).
5. Save the new admin account.
Q.9 How do I troubleshoot if the GUI is slow or unresponsive?
If the GUI is slow or unresponsive:
1. Ensure the Fortigate device is not overloaded with traffic.
2. Check for high CPU or memory usage on the device.
3. Update the firmware to the latest version.
4. Clear your browser cache and cookies.
5. Restart the Fortigate device if necessary.
Q.10 How can I access the Fortigate GUI remotely?
To access the GUI remotely:
1. Ensure HTTPS and/or HTTP access is enabled on the WAN interface.
2. Configure a secure method of remote access (VPN or IP restrictions).
3. Open the necessary ports (default is 443 for HTTPS) on your network firewall.
4. Use the Fortigate’s public IP address in the web browser.
ABOUT THE AUTHOR

You can learn more about her on her linkedin profile – Rashmi Bhardwaj


