Table of Contents:
Microsoft Outlook stores a local copy of your emails, tasks, calendar items, and other items in offline Outlook data (OST) file. The OST file is connected to the user profile in which it is created. This means you can’t export the file to another profile or platform. So, if you want to migrate this data file to Microsoft 365, then you can’t do it directly. In this article, we’ll look at ways to migrate offline Outlook data files or OST to Microsoft 365.
How to Migrate OST Files to Microsoft 365?
To migrate offline Outlook data (OST) file to Microsoft 365 account, you need to first convert the OST file into PST and then import the PST into Office 365. Let us look at the systematic process.
Step 1: Convert OST into PST Format
If OST file and the associated Outlook profile is accessible and working, then you can export the OST file data to PST file using the Import and Export wizard. Below are the steps:
1. Open Outlook.
2. Navigate to File > Open & Export > Import/Export.
3. In the wizard, select the “Export to a file” option and click Next.
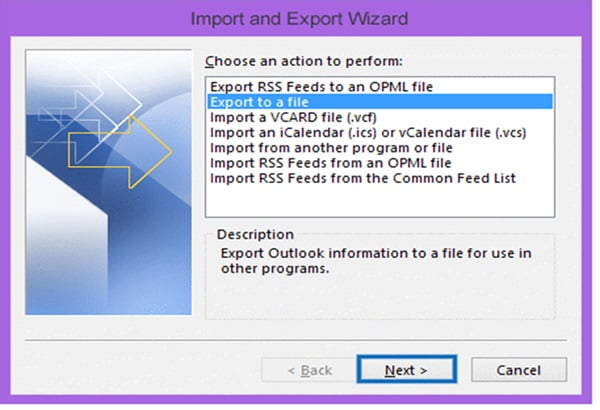
4. Select the “Outlook Data File (.pst)” option and click Next.
5. Select the folders you want to export and click Next.
6. Next, select the path for the destination file.
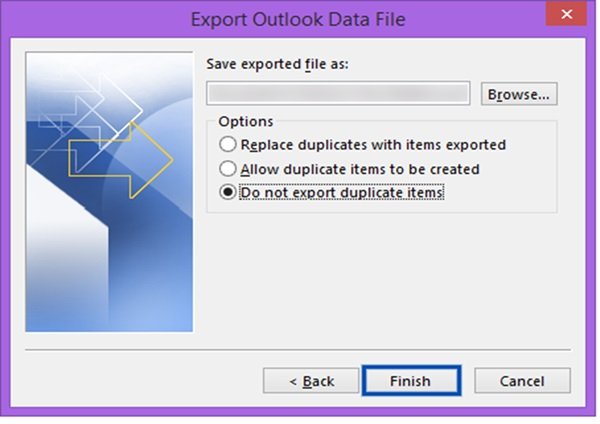
7. Select other advanced options (if required) and click Finish.
Step 2: Import PST File into Office 365
To import the PST files into Office 365, you need to use the Network Upload method. In this, you need to first upload the PST files in a temporary storage on the cloud and then import them into user mailboxes on Office 365. Let’s see the step-by-step process:
Note: Ensure you’ve Mailbox Import Export role assigned in Microsoft 365.
- Visit Office.com homepage, click Data lifecycle management, and then click Import.
- Next, select Import PST Files.
- To create import job, click New import job and provide a name to the job. Click Next.
- In Select Import Job Type, select the Upload your data option and click Next.
- Next, click Show network upload SAS URL.
- Now, click Copy to clipboard
- Click Download Azure AzCopy to download the tool.
- After downloading the tool, extract it on Desktop.
- Then, copy the folder containing the PST files on the Desktop.
- Open Command Prompt. Enter the ‘cd’ command to go to the extracted folder on Desktop where the azcopy.exe file is stored.
- Now, run the below command to upload the files on Azure Storage.
Azcopy copy “pathToFolder/ContainingPST” “SAS URL” –recursive=true
- Next, map the PST files with the user mailboxes on Microsoft 365. For this, you can use this PstImportMappingFile.csv.
- Now, start the PST import. For this, go to the Import Data wizard.
- Click the “I’m done uploading my files” and “I have access to the mapping file” options. Click Next.
- Click on the +Select mapping file option and then click on the Validate option. Then, click Next.
- Click Submit and then click Done.
As you can see, this is a long and tedious process. More importantly, even one misstep can cause data loss. Also, it requires technical expertise to perform the process.
A direct and easy way to migrate OST to Microsoft 365
To overcome the drawbacks of the above method, you can use a third-party OST to PST converter tool, like Stellar Converter for OST Technician. An advanced tool can help you to directly move data from your OST files to Microsoft 365. It is easy-to-use and comes with an intuitive interface, making it ideal for all users. Moreover, this tool guarantees 100% data security.
Here’s a quick look at some of the features of this tool.
- Converts inaccessible and orphaned Outlook data (OST) files into PST.
- Supports all Outlook versions.
- Converts large OST files without any data loss.
- Supports batch conversion of OST files.
Let’s look at the steps involved in migrating data from OST to Microsoft 365 using this tool.
Step 1: Download and Install
Download the tool and run the downloaded (.exe) file. This will open the installation wizard. Follow the prompts to complete the installation. You can stick to the default values.
Step 2: Select the OST File
When you open the tool, the home screen will prompt you to select the Outlook Data File (OST).
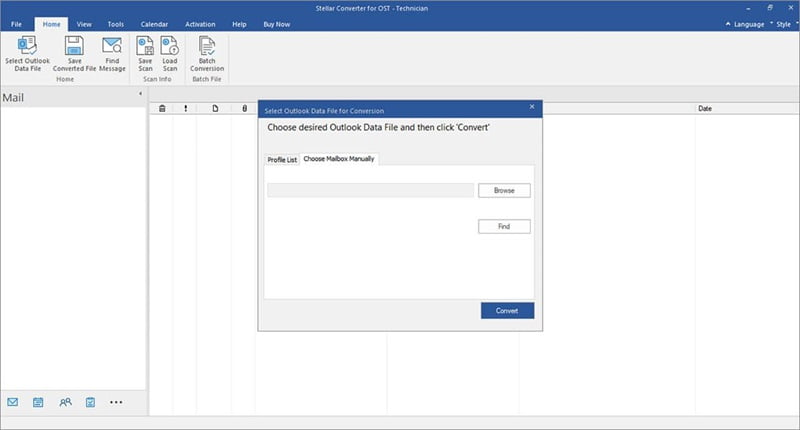
It will list all the Outlook profiles associated with your Outlook. You can select the one you want to convert.
Alternatively, you can go to the “Choose Mailbox Manually” tab to select the OST file.
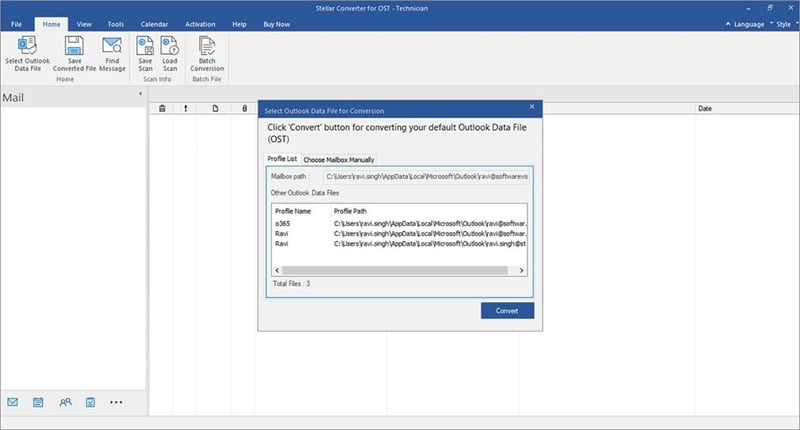
After making your choice, click the Convert button.
Step 3: Choose the Mail Items
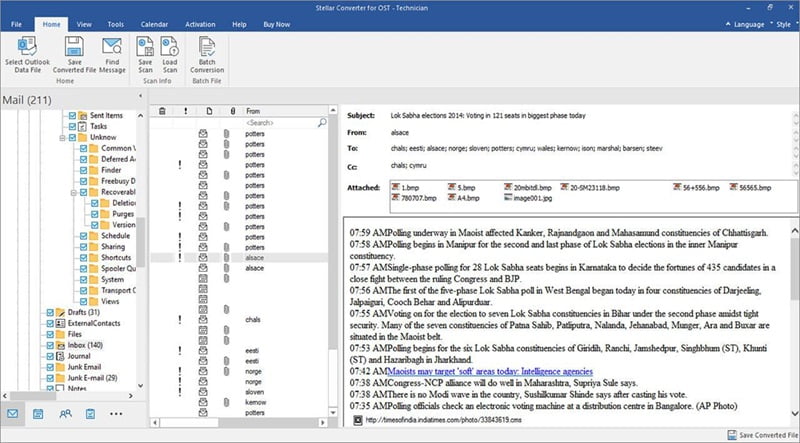
Depending on the size of your mailbox, this tool will take a few minutes to extract the contents from the file and will display them for you. Select the items you want to migrate to Microsoft 365.
Step 4: Enter your M365 Credentials
Click the Save Converted File option and select the Microsoft 365 option. The software will show all users profiles associated with Microsoft 365 account.
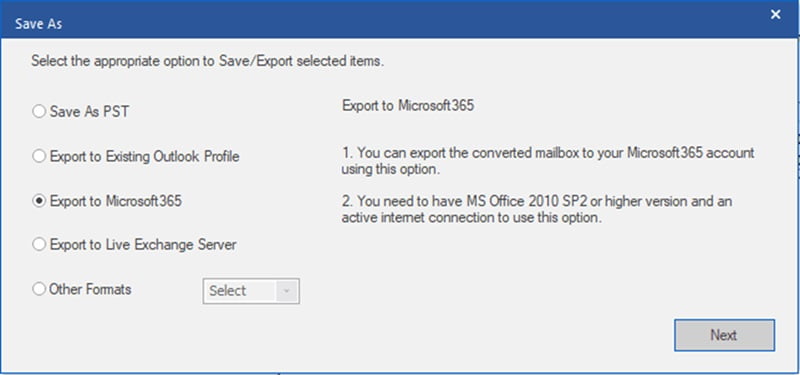
The tool will import the converted OST data to the selected contents to your Microsoft account. Once done, it will display a notification.
As you can see, this process is simple and hardly requires any effort from your end.
Conclusion
When it comes to manually migrating offline Outlook data file to Microsoft 365, you need to first convert the offline file to PST and then import it into Microsoft 365 using Network Upload method. However, the process is quite lengthy and cumbersome for a non-technical person. This is why most users prefer to use direct tools like Stellar Converter for OST Technician, as it is a safe, secure, and convenient way to migrate OST data to Microsoft 365. Its many features coupled with its affordable pricing make it perfect for users of all technical levels.
ABOUT THE AUTHOR
IPwithease is aimed at sharing knowledge across varied domains like Network, Security, Virtualization, Software, Wireless, etc.

