Amazon S3 Creating Bucket and Folder
You may have encountered an issues where your file is corrupted, or it’s lost in the server where you have stored it, or server has crashed. Suppose you have a website which has lots of videos, Images, data and you put all of them in dedicated servers and you must make sure that all are stored securely, backed up properly and available during peak time. Storing larger amount of data would cost very high in addition to additional overhead of managing the server. Your server should always be available when you require to store data. Hosting own storage server would lead to various issues like: –
- The cost of buying your own storage server hardware, associated software and high-speed internet connectivity (typically using a dedicated connection).
- The technical skills you or your staff will require in order to store, maintain
- The resources capable of providing round-the-clock support for the storage in order to ensure its availability for users.
- The need for specialist security expertise in employing tools and techniques to maintain the security of your Storage
Amazon has come with a solution which called Simple Storage service (S3), which is generally called an S3 BUCKET. S3 is an online storage space provided by Amazon that you can use to store and retrieve data, at whatever the time, from any place on the web. It gives a great deal of flexibility where one can pay as per their requirement. Infact the payment can also be customized as per accessibility type ie regularly accessed or accessed in a month.
We will be covering storage class in details in our further posts, for now let’s have a brief understanding of S3 bucket, its various components and structure.
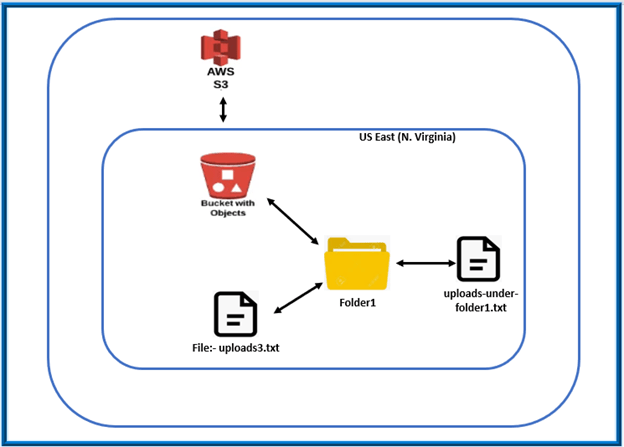
We will be creating a new bucket, uploading the file, creating a new folder and uploading the files in it.
Buckets: – When you create a root-level folder in S3, that folder is referred to as Bucket, similarly the way we create a folder in our PC/ Laptop.
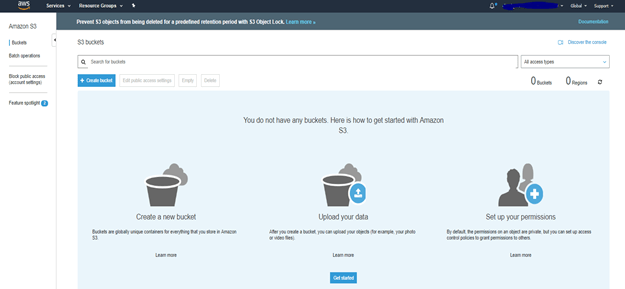
Click on create bucket
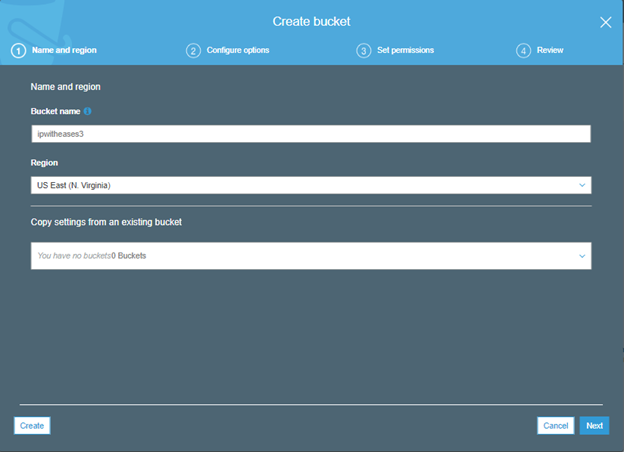
While creating a bucket, there are few things which are very important to understand and know.
- 1st is bucket name should be unique across all of AWS. Bucket name must be 3 to 63 characters of length. Bucket names can only contain lowercase letters, numbers and hyphens.
- 2nd thing is region. You should be selecting the region where your server belongs to or is hosted. After mentioning name and region, click create

Your bucket has been created and now the next step is to get file upload into the newly created bucket.
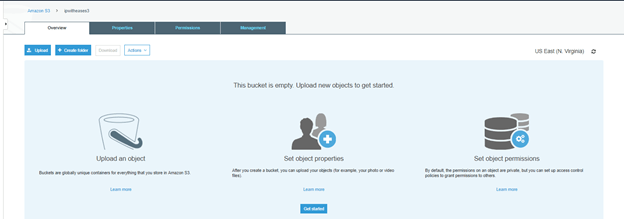
Click on the bucket “ipwitheases3” (Note – ipwitheases3 is the name of bucket)
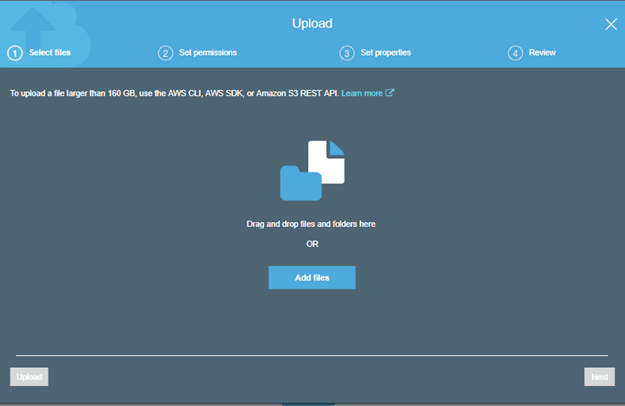
Add file which you wish to have on your newly created online storage.
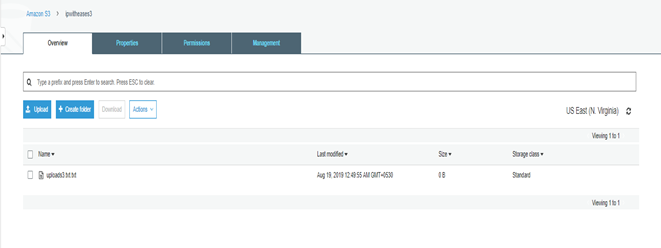
Now your file is in the bucket that you have created.

You can create a new folder and save your file in it as well.
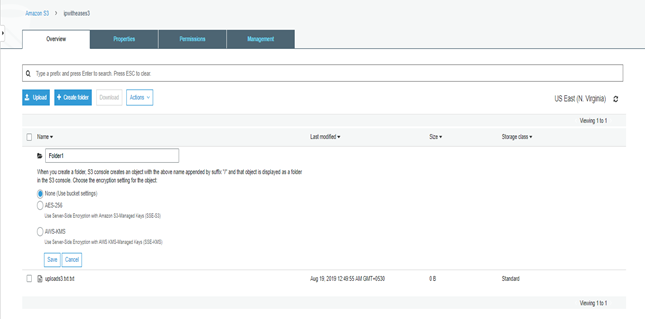
Mention name of folder and then save.

New folder has been created.

Click on folder and then upload the file which you wanted to save in it.
Related – Top 100 AWS Interview Questions
ABOUT THE AUTHOR

You can learn more about her on her linkedin profile – Rashmi Bhardwaj


